Social Icons

Showing posts with label chrome browser. Show all posts

Saturday, February 02, 2019

Test Ether Faucet : "Hello world" kind SMART CONTRACT

1.       Smart Contracts are self-executing contractual states, stored on the blockchain, which nobody controls and therefore everyone can trust.Continuing ahead with the earlier post wherein we created few test ethers from the ropsten test network and then transferred few back to create some transactions.In this post we move further and create a small smart contract.

First move to https://faucet.metamask.io/

Once you connect the same with your account,your will find an open code by default.Since just the beginning,we simply delete and create a fresh new page to insert the contract code in as seen below :

 Blank page as seen below :


Find the code of the file faucet.sol

 copy the code...and save the file as faucet.sol
 code pasted

 Now the time to RUN
 Do a small change...amend the solidity program version like I have done to 5.1 and then also it asks to amend public to external
 Followed by submit
 Now time to deploy the same....


Wednesday, January 23, 2019

Transactions in METAMASK:Ropsten Test Network Ethereum

1. While at https://anupriti.blogspot.com/2019/01/metamask-extension-in-chromeinstallation.html we have installed metamask,now in this post we do a transaction of ethereum.While at the beginning learning stage we ideally should not be playing with real ethers,so there is a provision to get test ethers and do some dummy transactions to get a feel of how it actually works.

Firstly,we change the network choice from the Main Ethereum Network to Ropsten Test Network as seen in the screen shot below:
 Then we visit https://faucet.metamask.io/
 Simply request ether.I requested twice. :-)
 So,I got two ethers
In the transactions part,we see the links and while we click on any,we get to see the details of the transaction that reflect along with other details live from the ropsten test network explorer
 The transactions details as below :
 The details of Gas to be debited as seen below :
 So,now minus 1 ether and some gas,I am left with a rounded off 1 ether(not exactly one ether,its minus gas)
 The details seen in the Block explorer....as below

METAMASK extension in Chrome:Installation

MetaMask is a bridge that allows one to visit the distributed web of Ethereum in the browser. It allows anyone to run Ethereum dApps right in  browser without running a full Ethereum node.MetaMask includes a secure identity vault, providing a user interface to manage your identities on different sites and sign blockchain transactions.Below screen shots are self explanatory for installation of MetaMask in chrome browser.

Goto the extension link at google chrome store at https://chrome.google.com/webstore/category/extensions
 Search for MetaMask
 Add the extension as seen in the screen shot below
 Welcome screen of MetaMask
 Create your Password

 Click accept


Download your phrase and store it as deemed appropriate secret location,duly encrypted ...since this single phrase will be the key to fiddle with your ethers ahead


 Installation part complete

Thursday, January 29, 2015

How to Set Up Google Chromecast : Windows 8

1.   Chromecast is a 2.83-inch (72 mm) HDMI dongle ,a digital media player developed by Google that plays audio/video content on a high-definition display by directly streaming it via Wi-Fi from the Internet or a local network. Users select the media to play using mobile apps and web apps that support the Google Cast technology. Alternatively, content can be mirrored from the Google Chrome web browser running on a personal computer, as well as from the screen of some Android devices.This post further brings you screen shots of the Chromecast setup as I set it up on one windows 8 Laptop...sadly it doesn't have a straight setup for UBUNTU OS...though I have seen few forums wherein a plugin mention in regular chrome browser would set the cast working...but alas not tried that...here it is a simply setting it up on Windows 8.

Step 1 : As you plugin the chromecast powered by USB Power in the HDMI slot ,you get a similar looking screen.
  
On your Chrome browser log onto google.com/chromecast/setup
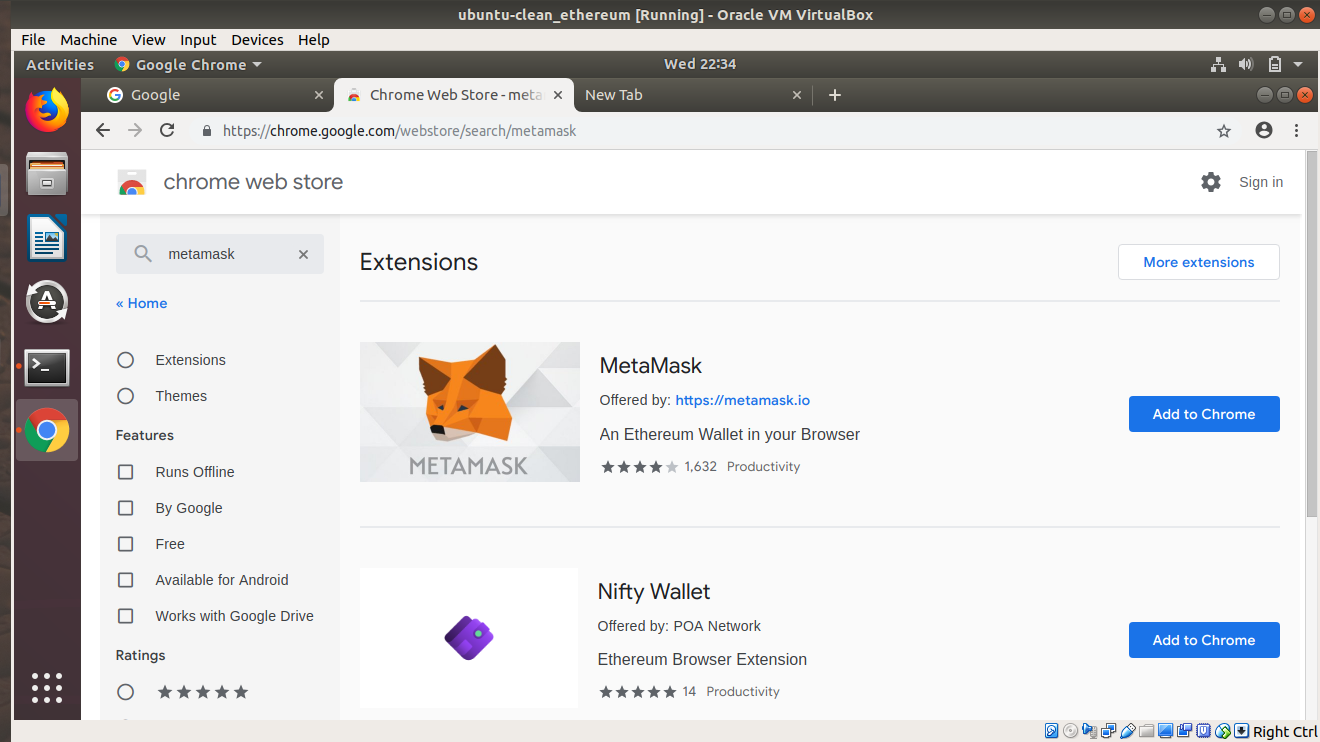
As you click the above link you get a download setup file...around 800 kb...download that and your installation begins....
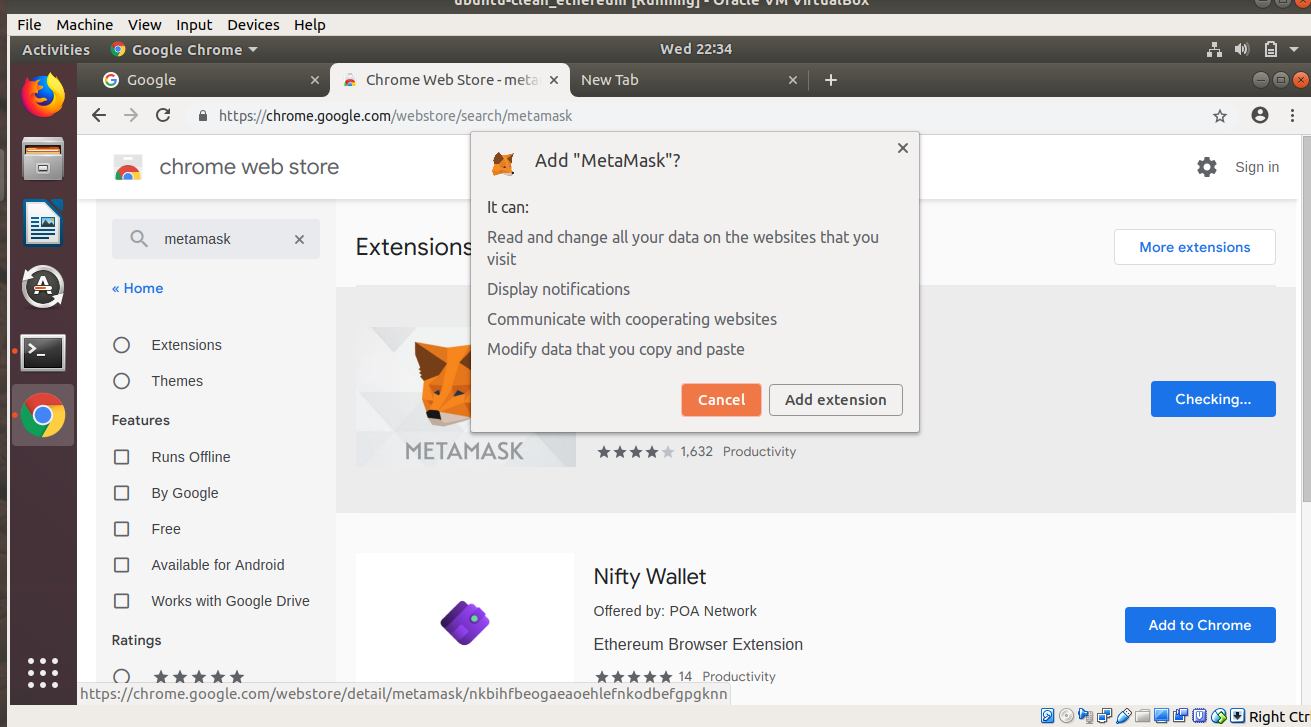
Typical Next Next.....
You get the device number as detected by the Laptop machine

Once connected a unique code is seen as below on the TV...just confirm that you see the same on your PC too as shown further below :
Unique code replicated on Laptop screen as below :
Click on That's My Code and continue as seen below :
Seen connecting to the network SSID
Setting up the Device on joining the network
and you are ready to cast :
The first time the device is ready to cast,expect recent update on the Chromecast dongle like seen below...likely to take few minutes...mine took 7-8 minutes
Updating still....12%
Updating still....61%
Updated and now applying updates
and the first look of the device on way to cast a Youtube stream as below :
What do I cast first ?...off course Rajinikanth....:-)

Few things to ponder and for info first time users :

- Why is not ready for Opensource OS?
- Works equally ready with Android devices with ease
- Does not work on a Windows OS running in Virtual Box/Machine.
Powered By Blogger