Social Icons

Showing posts with label digital forensics. Show all posts

Saturday, May 02, 2020

Installation Bitcoin core on UBuntu 18.0.4 LTS : Bitcoin Mechanics -1

With this first post special to Bitcoin core,over next few months I intend to do some exploring on the bitcoin mechanics part.This basically means playing with the blocks and blockchain vide few python based scripts.Will start from the installation part followed by other posts on extracting info from bitcoin blockchain. This post basically is straight forward installation with the following commands.Screen shots for info :

Firstly install snapd with the following commands

sudo apt update
sudo apt install snapd

 
 click green button install

after this installation of snapd,one single command as follows:

sudo snap install bitcoin-core

The effected screenshots are seen below :


Once installed ,you can check on the terminal...should see three bitcoin applications by tabbing


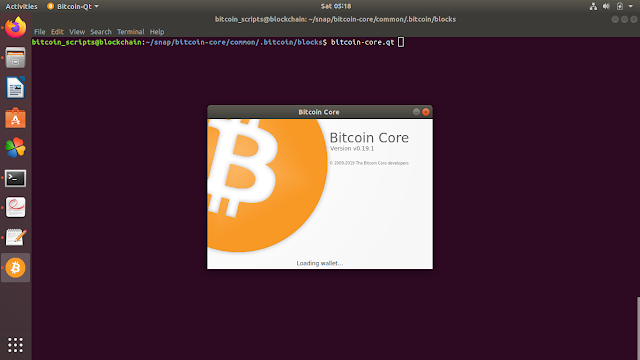
While the GUI shows as below


When you run for the first time,the GUI notification pops for asking for location of default directory for storing blocks.


Thereafter the blocks start getting downloaded with status of files downloaded visible....


Blocks downloaded status is seen below...this downloading around 287 GB as on date will take time as per download speed available.


The location of the blocks being downloaded will be at /home/bitcoin_scripts/snap/bitcoin-core/common/.bitcoin/blocks where bitcoin_scripts is the user name.

Next post we will see whats inside the block....

Friday, September 25, 2015

Volatility Command : Using kdbgscan/kprcscan to scan for potential KDBG/KPCR structures

This post will share an example to run the two volatility terminal commands including kdbgscan and kprcscan.

Before I proceed ahead,I would assume that you have installed volatility in your Linux system(in my case I am using UBUNTU) (Installation explained at my earlier post at http://anupriti.blogspot.in/2015/09/volatility-advanced-memory-forensics.html) and you have a RAM dump of the OS u desire to analyse.In my case here I have taken the RAM dump of a Windows 7 OS as explained here at http://anupriti.blogspot.in/2015/09/volatility-command-using-imageinfo-to.html

Basic intro about these two commands :

kdbgscan

This command is used to scan for potential KDBG structures and is meant to positively identify the correct profile of the system and the correct KDBG (kernel debugger block) address. It simply scans for KDBG header signatures linked to the profiles in Volatility.

Usage : 

python vol.py --profile=Win7SP0x86 -f filename.raw kdbgscan

Screen shot executing the above command shown below :
(CLICK TO ENLARGE)
kpcrscan

This command is used to scan for potential KPCR(Kernel Processor Control Region) structures. A KPCR is a data structure used by the kernel to store the processor-specific data. Kpcrscan searches for and dumps potential KPCR values. On a multi-core system, each processor has its own KPCR. Therefore, ideally  one should see at least as many KPCR addresses as there are processors on the machine from which the memory dump was acquired.Usage as follows :

python vol.py --profile=Win7SP0x86 -f win_image.raw kpcrscan

Screen shot with output as below :
(CLICK ON IMAGE TO ENLARGE)


Volatility Command : Using IMAGEINFO to find type of System Image

1.   After installing Volatility as I gave details in my post here,next we need to start exploiting the power of Volatility.In my next posts ahead I would decipher usage of the general commands used for Volatility.To start with I initiate with IMAGEINFO command whose output tells the suggested profile that you should pass as the parameter to --profile=PROFILE; there may be more than one profile suggestion if profiles are closely related. One can figure out which one is more appropriate by checking the "Image Type" field, which is blank for Service Pack 0 and filled in for other Service Packs.

2.  Next few screen-shots show how I have taken the RAM dump of Windows 7 OS with the help of DUMPIT utility that I downloaded from here.Dumpit vastly simplifies memory acquisition. Effectively Dumpit combines win32dd and win64dd into one tool and is so simple to use even a non-technical user could do acquisition from a USB key. The dump can then be analyzed using VOLATILITY.

3.   Firstly,I show u the windows screen here with the Dumpit file on desktop which I simply click one to get the dump.
 I get the following screen and I click YES
 Further yes to the command prompt screen starts the dump download as seen below :
 I get a success message here and the dump is ready for analysis.
 The .raw file that is generated,I move it to ubuntu for analysis which has Volatility installed.At the terminal I type the command as :
python vol.py -f file_name.raw imageinfo


and in a few minutes I get the profile suggested as Win7SP0x86 / Win7SP1x86

Monday, August 17, 2015

Kali Linux 2.0 : The new release has arrived

Kali Linux ,is a well known Penetration testing distro and also contains a plethora for digital forensics, is widely used by ethical hacker community across the globe and is maintained and developed by the organization known as “Offensive Security”. It comes with over 650 tools pre-installed that help  perform tasks like network analysis, ethical hacking, load & crash testing etc. It is powered by Linux kernel 4.0 and has enhanced support for different graphics cards and desktop environments.The most recent version of Kali has just been released few days back and here I bring you the installation step by step screen shot being installed in Virtual Box.


 Choose Install above


The desktop boots to the following screen...thats it... You are ready to go....

Wednesday, June 10, 2015

Cloud Forensics: Challenges Only Ahead

1.   Cloud Computing is emerging amongst all the bombilate words of acclivitous technologies as the most prodigious maturations in the chronicles of computing. As it still takes time to settle, a new egressing challenge as felt whilst its implementation across has been a relatively more newfangled field known as Cloud Forensics. Today as Cloud still needs time to mature and offer its full exploitation, the even newer subfield Cloud Forensics is a carking cause to negate immediate acceptance of cloud computing with open arms. The research in this field is still in parturient stages to say from perspective of the way cases and incidents are being handled on ground today. 

2.   My paper got published in "Cyber Times International Journal of Technology & Management".The "Cyber Times International Journal of Technology & Management" (CTIJTM) was launched in 2007 by "Cyber Times - PRESS" in order to promote Latest Research and innovations in the Area of Technology & Management.The"Cyber Times International Journal of Technology & Management" (CTIJTM) is Bi-Annual, Double Blind Peer Reviewed, International Journal with International Serial Standard Number which is available in print and online versions. It provides the new paradigms in the embryonic fields of Technology, Management, Science, Electronics, Law, Economy etc. and visualizes the future developments in the respective areas. It is meant to publish High Quality Research Papers with innovative ideas, inventions, and rigorous research which will ultimately interest to research scholars, academicians, industry professionals, etc.The paper is available at the following links :

http://journal.cybertimes.in/?q=Vol8_A_P1_01


and also for viewing at scribd as below :

Sunday, February 15, 2015

Can we trace back device make-model from a MAC address?

Mac address of a Electronic device viz mobile/laptop are very critical for a investigating team dealing with a Cyber Incident.From an investigator point of view this one attribute associated with every device can give the Name of the OEM.I searched on net to find if the make and model of the device can be traced back via the Mac Address but couldn't find much...except for the name of the OEM I couldn't get much...for a Laptop I could get Dell and for a mobile device I could get samsung....nothing much....Is their anyway to identify and trace back the make/model??????


Friday, August 22, 2014

FOCA : Extracting website Meta data

1.    Metadata is "data about data". It provides info about a certain item's content like for example, an image may include metadata that describes when was the picture clicked,which camera was used to click the image,the resolution etc. A text document's metadata may contain information about how long the document is, who the author is, when the document was written, and a short summary kind of document.Metadata can be useful to Penetration Testers,because it contains information about the system where the file was created, such as Name of users logged into the system,Software that created the document and OS of the system that created the document.This post will introduce to a tool know as FOCA ...that stands for

Once the project is named and u locate to store the project files, click on the Create button, as shown below :

Next thing to do is save the project file and click on the Search All button so FOCA will use search engines to scan for documents.


Right-click on the file and select the Download option, as shown below:

Right-click on the file and select the Extract Metadata option, as shown below :

Right-click on the file and select the Analyze Metadata option, as shown above :
 One can see the user who created and used this document as seen below :
You can also see what all software’s have been used to create the document.
In many cases, attackers will be able to see much more information and gather intelligence about a target, the network, usernames, etc… by using this tool.Though the tool is available with Kali but with newer versions it is only available with Windows....


Powered By Blogger