1. Sublime Text is a proprietary cross-platform source code editor
with a Python application programming interface. It natively supports
many programming languages and markup languages, and functions can be
added by users with plugins, typically community-built and maintained
under free-software licenses.The installation part of the same on Ubuntu will just take few commands as seen below and the sublime editor will be ready to go.The commands are listed below :
1. The Volatility Framework is a completely open collection of tools, implemented in Python for the extraction of digital artifacts from volatile memory (RAM) samples. Volatility is a memory forensics framework, to analyse ram memory dumps for Windows, Linux, and Mac. In order to analyse a operating system’s RAM memory in Volatility, you need to build the corresponding operating system’s profile.The extraction techniques are performed completely independent of the system being investigated but offer unprecedented visibility into the runtime state of the system. The framework is intended to introduce people to the techniques and complexities associated with extracting digital artifacts from volatile memory samples and provide a platform for further work into this exciting area of research.Vide this post, I am sharing how to install volatility in Ubuntu 12.04 in a step wise manner.The post includes screen-shots and ready to shoot terminal commands for installing other dependent libraries.
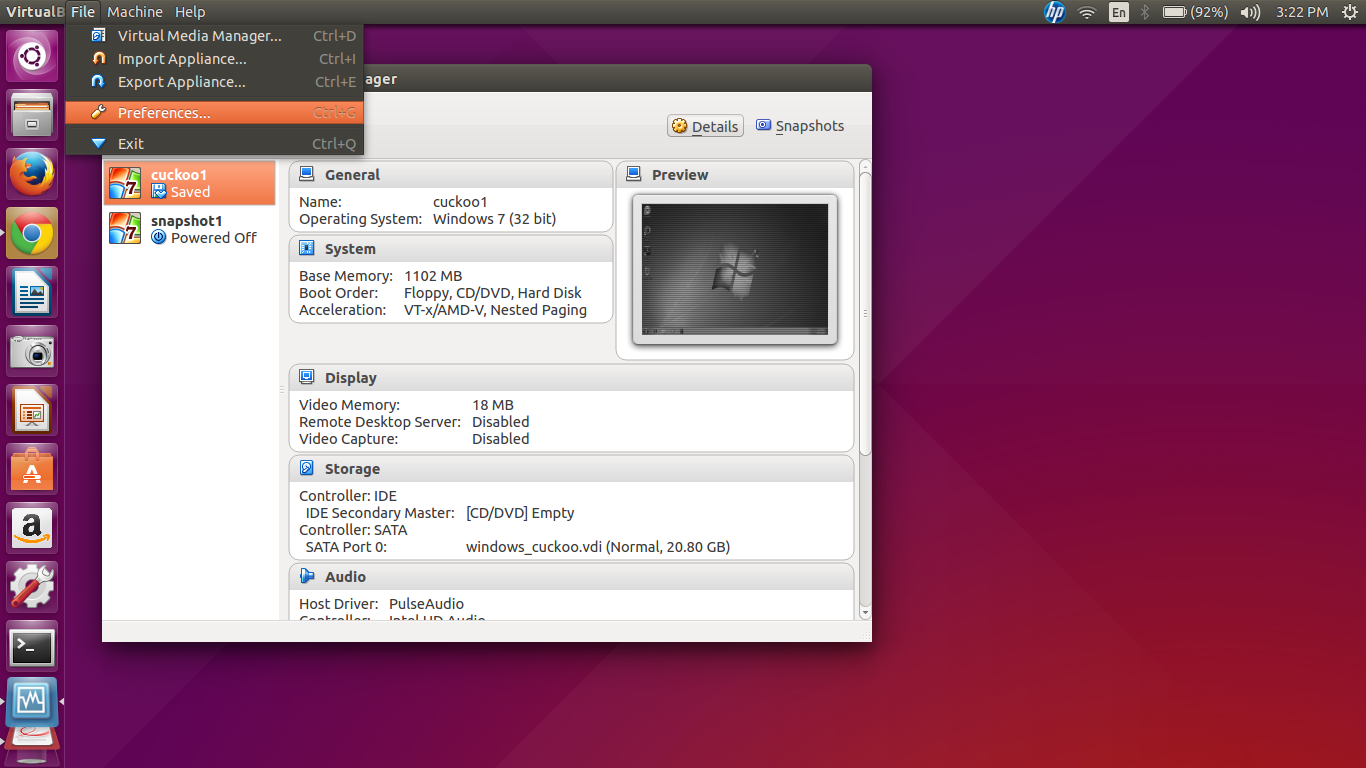
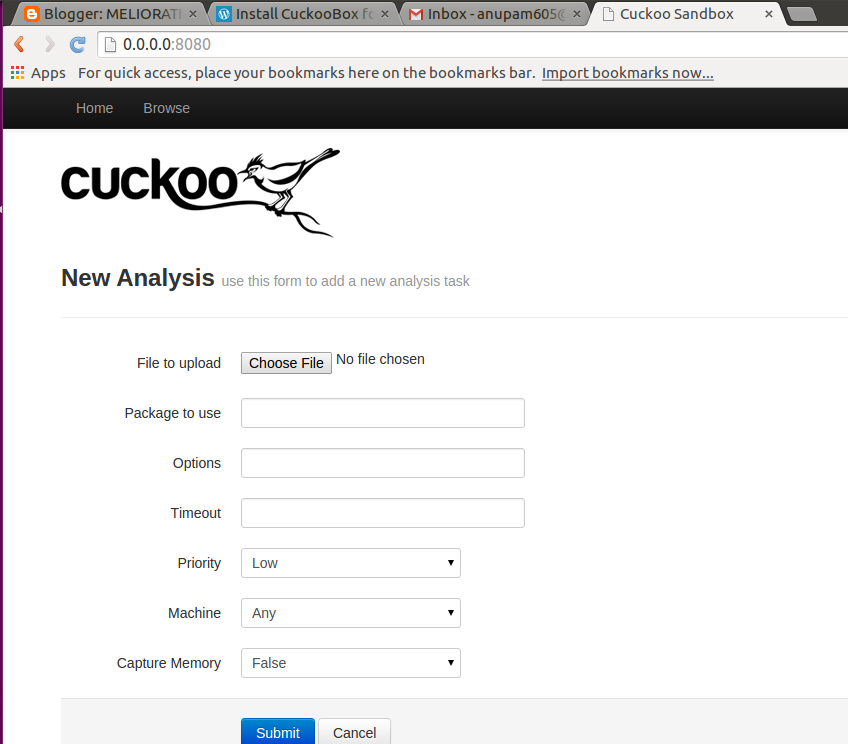
1. Cuckoo Sandbox is a malware analysis system tool which allows you to throw any suspicious file at it and in a matter of seconds it will provide you back some detailed results outlining what such file did when executed inside an isolated environment.It is written 100% in Python, the architecture is very interesting and it is based on a virtualisation engine like Virtual box to maintain a “fresh” pc always at hand to run the malware called the client, inside this client it is run as an agent that is also written 100% in Python to monitor the different calls that the malware do to the dll’s, host that try to connect, etc.The connection between the Server and the client is done through an isolated network set up by virtual box, it is configured that way in order to avoid the propagation of the malware and to communicate effectively between the client and the server to send the analysis report, infected binaries, etc.This post ahead brings you a step by step screenshot to download and configure this excellent tool,will be good for beginners in cyber security/penetration testing to play with and see results immediately.Though from the looks of this post below,the procedure looks cumbersome and complex,but I have made attempts for a naive to understand and follow up screenshot wise,any queries still will be most welcome :
WHAT IT DOES PRECISELY?
2. Cuckoo can produce the following types of results:
- Files being created, deleted, and downloaded by the malware during its execution
- Network traffic trace in PCAP format(as we get with wireshark and ethreal)
- Traces of win32 API calls spawned by the malware
- Memory dumps of the malware processes
- Screenshots of the Windows desktop as it happens during execution of the malware
- Full memory dumps of the machines
KINDS OF FILES FOR ANALYSIS
3. The following kinds of files can be analysed and put for check in cuckoo :
- Adequate RAM around 4 GB in all with the parent machine.
- i3 processor and above will help u lessen wait and make u patient
5. Python comes preinstalled with the Ubuntu Desktop,but we need some extra python libraries as follows :
Pydeep
Sqlalchemy
Bson
DPKT
Yara
MAEC Python bindings
Jinja2
Magic
Chardet
Pymongo
tcpdump
mongodb
Volatility
Libvirt
Bottlepy
Django
Pefile
Step 1
Firstly we will install all the above mentioned libraries vide a single command.You need to slect the below text and paste as it is in the terminal | sudo apt-get install mongodb python-sqlalchemy python-bson python-dpkt python-jinja2 python-magic python-pymongo python-gridfs python-libvirt python-bottle python-pefile python-chardet tcpdump -y
Besides above,there are other python libraries that need PIP for installation.Pip is an alternative to Easy Install for installing Python packages and is largely recommended when used in virtual environments.
Two additional software Yara and Pydeep too need to be installed and the cuckoo documentation states these need to be installed separately, however Yara is provided in the Ubuntu universe repository. but before installing Pydeep , we need to install some dependencies with the following command line to install the following :
Cuckoo requires Yara 1.7 or higher and to install yara,run the following command
sudo apt-get install yara -y
Pydeep depends on ssdeep 2.8+ and ssdeep needs to be compiled from source and likewise for Pydeep. Before doing so, a few packages are needed. The following commands will work :
| sudo apt-get install build-essential git python-dev -y | wget http://sourceforge.net/projects/ssdeep/files/ssdeep-2.12/ssdeep-2.12.tar.gz/download -O ssdeep.tar.gz | tar -xf ssdeep.tar.gz | cd ssdeep-2.12 | ./configure | make | sudo make install | ssdeep -V | 2.12(output for above)
We also need to install “git’:
sudo apt-get install git
Now cd to the directory Download, clone the pydeep project and install manually:
git clone https://github.com/kbandla/pydeep.git
cd pydeep
sudo python setup.py install
Install Yara
sudo apt-get install libtool automake
Then download yara form the git repository and install it:
Now we need to install yara-python with the following commands:
cd yara-python
sudo python setup.py install
Volatility supports memory dumps from all major 32- and 64-bit Windows versions and service packs including XP, 2003 Server, Vista, Server 2008, Server 2008 R2, Seven, 8, 8.1, Server 2012, and 2012 R2 but in recent past now on supports Linux memory dumps in raw or LiME format and include 35+ plugins for analyzing 32- and 64-bit Linux kernels from 2.6.11 - 3.16 and distributions such as Debian, Ubuntu, OpenSuSE, Fedora, CentOS, and Mandrake.VOLATILITY is to be installed next,we need the following commands:
Where user:usergroup is the user used to login to the ubuntu machine and the group is the group to which user belong
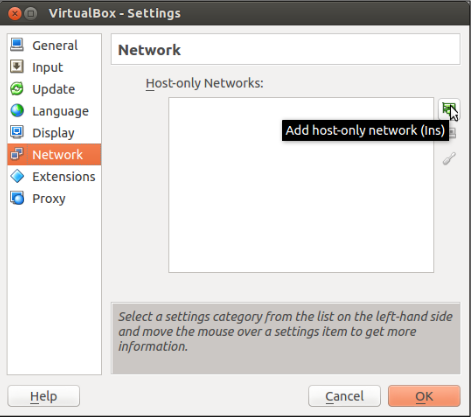
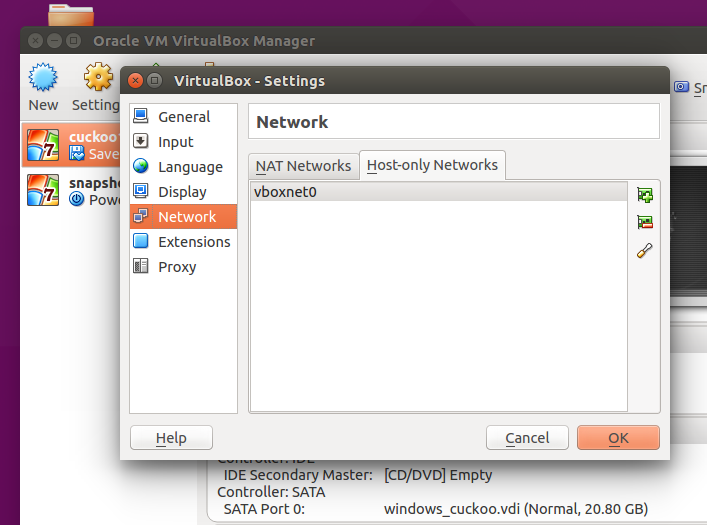
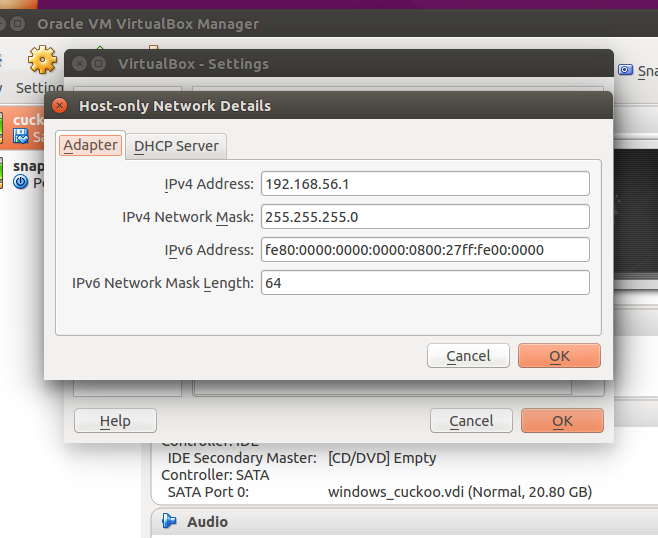
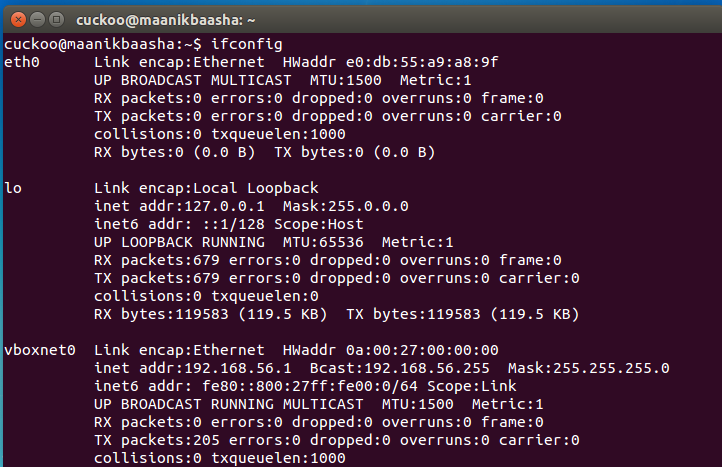
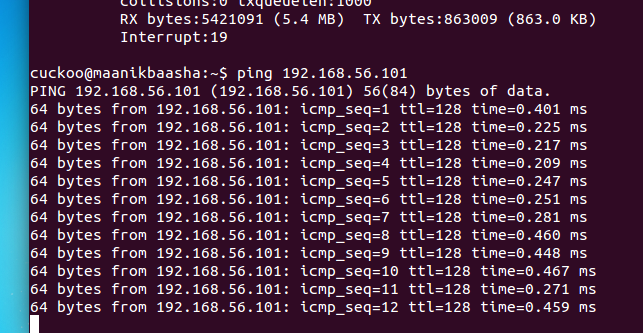
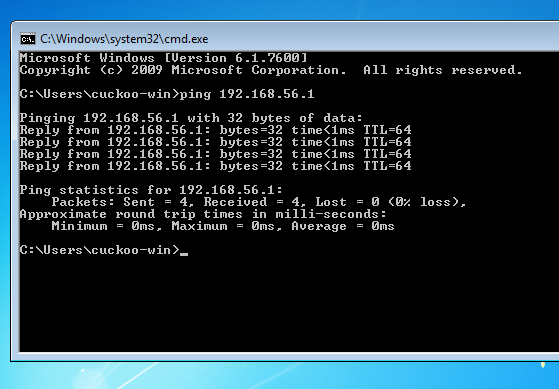
Now we shift our attention to configuring networks for Virtual Box and parent machine.So I assume you have installed Windows 7 in virtual box with Adobe,Microsoft Office and a Mozilla/Chrome browser.
Configure as shown next below :
Vide the above,the two IP addresses I have configured to ping are :
Parent/Host OS : 192.168.56.1
Virtual Windows Machine : 192.168.56.101
Just ping from each IP to other,if they ping all is set now to work ahead.
and one important step that remains is to configure the conf files in the cuckoo configuration,Few important configuration files that we effect to work with are mentioned below with brief functionality:
cuckoo.conf : This configuration file contains information about the general behavior and analysis options in Cuckoo Sandbox. machinemanager.conf : This file holds the information about your virtual machine configuration: Depends on the name of virtualization that we used. processing.conf : This file is used for enabling/configuring the processing of modules. reporting.conf : This file contains information about reporting methodologies.
There are a few things required to be changed in the configuration files as follows:
[I used gedit to edit and make amends to these conf files]
/opt/cuckoo/conf/cuckoo.conf
[cuckoo] memory_dump = on [resultserver] ip = [ip address of the vboxnet0 interface, to check it issue on terminal ifconfig vboxnet0, usually 192.168.56.1]
/opt/cuckoo/conf/virtualbox.conf
[cuckoo1] label = [Name of the Windows guest virtual machine as configured on VirtualBox] ip = [ip address configured i the windows guest] snapshot = [the name of the snapshot taken with virtual box] /opt/cuckoo/conf/memory.conf [basic] delete_memdump = yes
/opt/cuckoo/conf/processing.conf
[memory] enabled = yes [virustotal] enabled = yes key = [key of the virus total API, could be obtained registering in http://www.virustotal.com
/opt/cuckoo/conf/reporting.conf
[maec40] enabled = yes [mongodb] enabled = yes
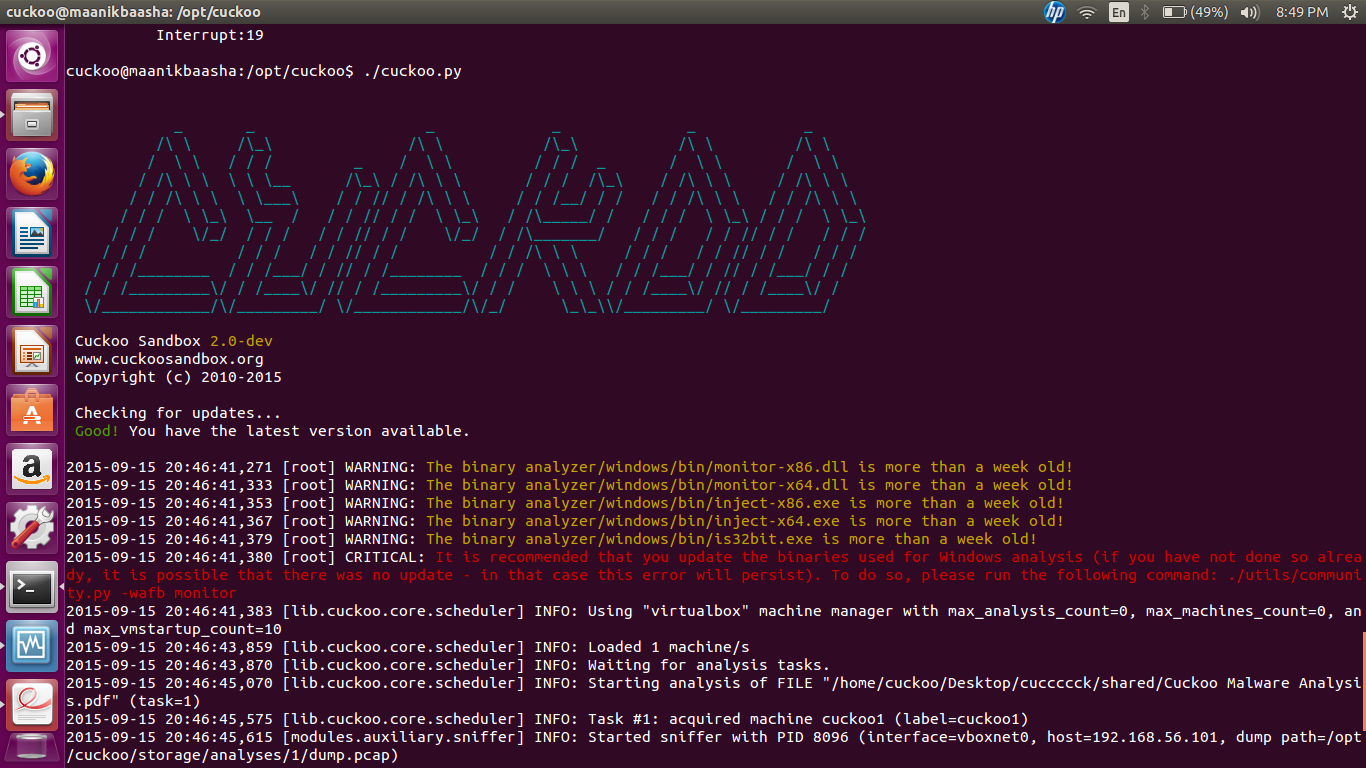
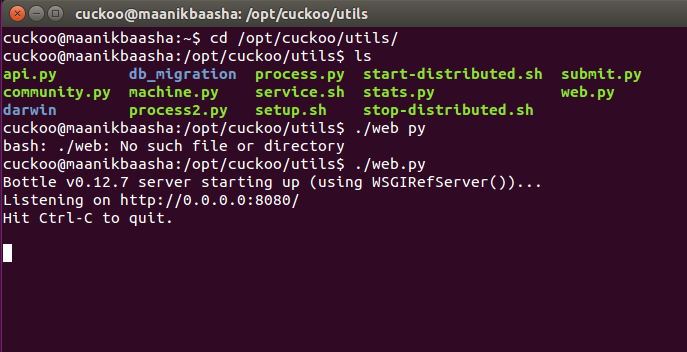
Now we can run Cuckoo after all the hardwork :
run the command as shown below and you should get the screen as below :
sudo python /opt/cuckoo/cuckoo.py
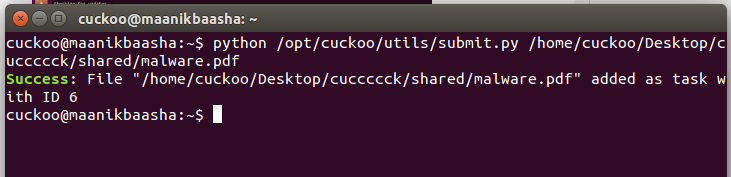
Now we need to do a submission of a file vide a script as shown below :
1. The name of this tool is such that a layman might start pondering some other thoughts :-)..Webshag ... is actually a multi-threaded, multi-platform web server audit tool that's coded in Python and gathers useful common functionality for web server auditing like website crawling, URL scanning and file fuzzing.This can be used to scan a web server in HTTP or HTTPS, through a proxy and using HTTP authentication. In addition to that it proposes innovative IDS evasion functionalities aimed at making correlation between request more complicated. It also provides innovative functionalities like the capability of retrieving the list of domain names hosted on a target machine and file fuzzing using dynamically generated filenames (in addition to common list-based fuzzing).This post gives out a stepped screenshot on how to use it in Kali Linux for auditing a website.
The post shows the screen-shots for a Webshag version 1.10....that's the latest as on date...like always I have...this tool is too an opensource tool with a great functionality.....
I was recently playing with Matriux Krypton tool chaosmap....but was unable to use this tool for some error that kept popping up...so I though if at all the PYTHON is installed or not?......the way to check this is to go to the terminal and write :
 https://orcid.org/0000-0002-9097-2246