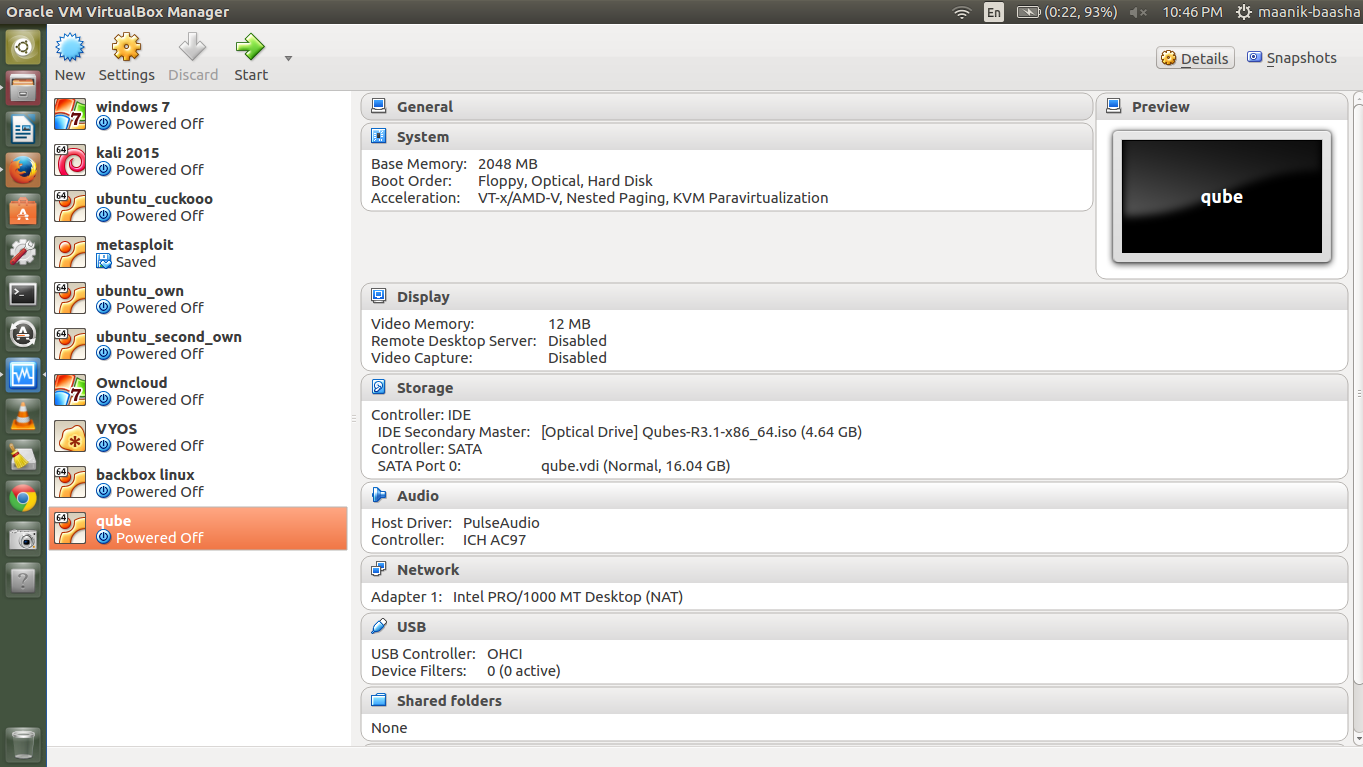
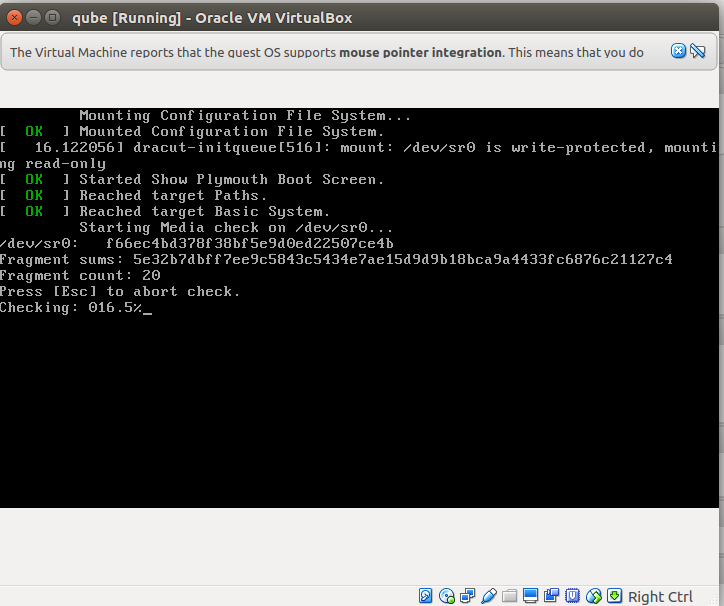
1. I have a habit of running most of the Operating systems in Virtual Environment(mostly Virtual Box) that I keep experimenting with.Till date I have had no issues running anyone of them inside Virtual Box including Ubuntu,Fedora ,Mint,BackBox , BackTrack ,Metasploit , Windows , Pentoo ,Knoppix ,Chromium OS, Arch Linux , Open Suse, Red Hat etc....in fact the list goes on.But whilst exploring the QUBES OS today...I found the Virtual Box unable to run it...and always getting the following screens :
2. Qubes is a security-oriented operating system (OS) and an extract from the installation advise is shown below :
Extract produced below :
Note: We don’t recommend installing Qubes in a virtual machine! It will
likely not work. Please don’t send emails asking about it. You can, however,
install it on an external USB hard drive and run from it, at least for testing.
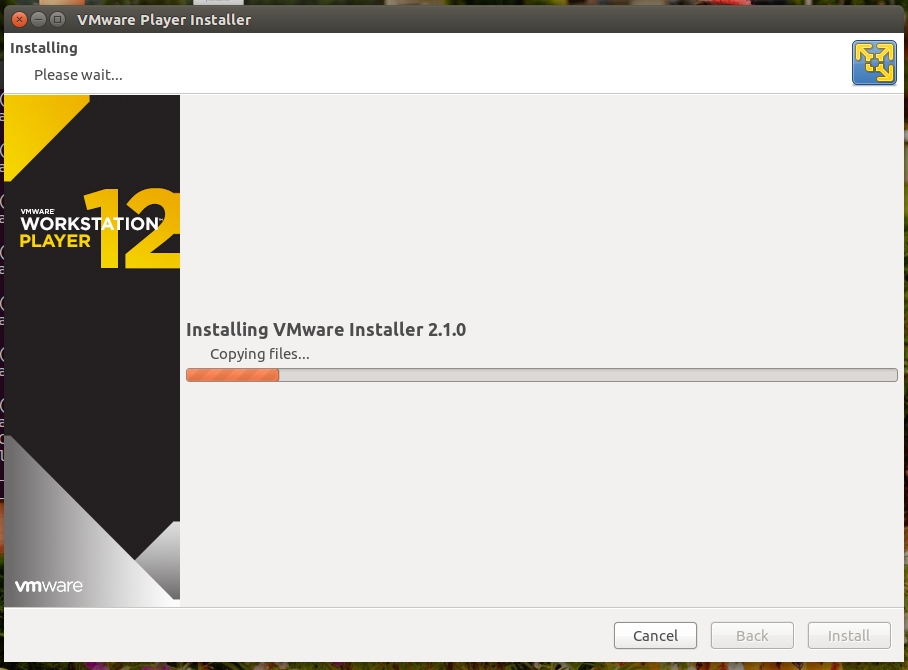
3. But further to my surprise,I found via Google searches that this OS works fine with VMWare workstation player.And after I tried it,I found it works perfectly fine as I show it in my next post.I though couldn't find a resolve or any kind of solution to run it fine on the Virtual Box but then till the time VMware workstation performs the task,I am ok :-)
1. VMware Workstation Player is a virtualization software package for x64 computers running Microsoft Windows or Linux, supplied free of charge by VMware, Inc. VMware Player can run existing virtual appliances and create its own virtual machines and uses the same virtualization core as VMware Workstation, a similar program with more features, but not free of charge. VMware Player is available for personal non-commercial use, or for distribution or other use by written agreement. VMware, Inc. does not formally support Player, but there is an active community website for discussing and resolving issues, and a knowledge base.
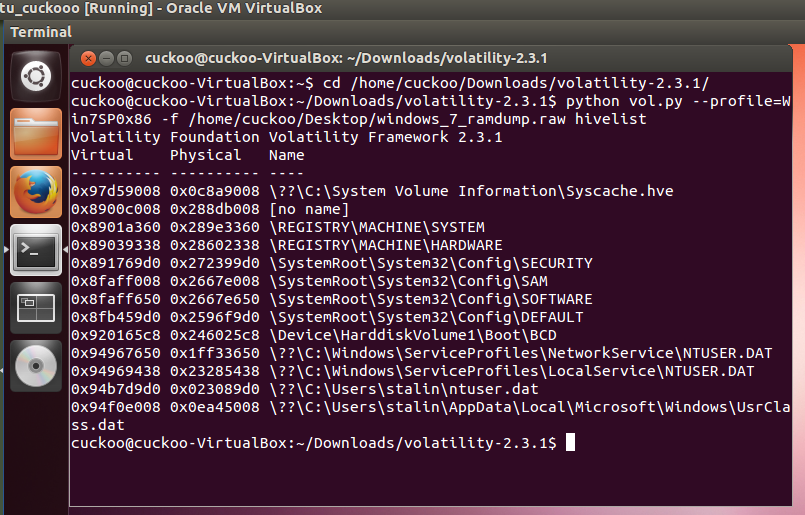
1. For those of you who have started reading this post coz of the tempting post title claiming extracting username/passwords from a RAM Dump,I must assure you it is possible easily in few steps using Volatility Framework.In the post ahead I have a RAM dump of a Windows 7 OS and I have been able to extract the user names and passwords of these users in three simple steps using Volatility Framework.Well,I will quickly get to the steps with screenshots :
Hashdump output seen with user names and NTLM dump CLICK TO ENLARGE
As we see vide above screen shot we have been able to extract names of users as stalin,VOLA and TILITY with hash of passwords against their names.Now we will decrypt these hashes.
DECRYPTING NTLM hash
Now comes decrypting this hash as we have got vide hashdump above.Hashes can now be cracked using John the Ripper, rainbow tables, etc.Now no need to install these crackers separately.Simply google for online decryptos and you will get the password too.I used this site at http://www.hashkiller.co.uk/ntlm-decrypter.aspx
Screen shots below:
Password extracted is test_1234 CLICK TO ENLARGE
Password extracted is test_123 CLICK TO ENLARGE
Password extracted is test CLICK TO ENLARGE
So in all two terminal commands running volatility hivelist and hashdump followed by decrypting the hash online will give you the usernames and passwords from the RAM dump.Any queries and questions or advises are most welcome.Thanks
1. Burp Suite is an excellent easy-to-use integrated platform for web application security that includes multiple tools seamlessly integrated to test every component and aspect of modern web applications. Whether you need to verify the robustness of your authentication mechanism, the predictability of your session tokens, or the input validation checkpoints present in your application, Burp is often compared to Swiss-army knife for security practitioners since it offers a horde of features . Not only does it allow in-depth manual assessments, but it also combines automated techniques to enumerate and analyze web application resources.Burp has been developed by PortSwigger Ltd. and is available in two editions:
- Burp Free
- Burp Professional
In-fact,the free version is perfect to start for beginners as it contains all the basic tools to find at least few first vulnerabilities.In its simplest way to explain, Burp is a local web proxy that allows to intercept, inspect, and modify HTTP/S requests and responses between the user's browser and the target website. While the user navigates through the web application, the tool acquires details on all visited pages, scripts,parameters, and other components. The traffic between the browser and the server can be eventually visualized, analyzed, modified, and repeated multiple times. The different tools included in Burp Suite can be easily distinguished by the upper tabs:
- Proxy: It allows to intercept and modify all web traffic.
- Target: This tool allows to aggregate all web application resources, thus guiding the user throughout the security test.
- Scanner: A complete web application security scanner, available in the Professional version only.
- Intruder: Burp Intruder allows to customize and automate web requests.
- Spider: Automatic crawler that can be used to discover new pages and parameters.
- Sequencer: Used for verifying the randomness and predictability of security tokens, cookies, and more.
- Decoder: It allows to encode and decode data using multiple encoding schemes
- Comparer: A visual diff tool that can be used to detect changes between web pages.
- Repeater: A simple yet powerful tool that can be used to manually modify and re-issue web requests.
How to go about Installation ?
- A minimum disk space of at least 200 MB is required.
- Required memory is at least 1 GB
- Burp Suite works on Windows, Mac OS X, and Linux
- Software components: An updated Oracle Java Runtime Environment is required to run Burp Suite.
dlllist is used to display a process's loaded DLLs.DLLs are automatically added to this list when a process calls LoadLibrary (or some derivative such as LdrLoadDll).
To display the DLLs for a process that is hidden or unlinked by a rootkit, first use the psscan to get the physical offset of the EPROCESS object and then:
dlldump command is used to extract a DLL from a process's memory space and dump it to disk for analysis.The syntax is nearly the same as what has been seen earlier with any command.This plugin provisions the following :
- Dump all DLLs from a hidden/unlinked process (with --offset=OFFSET)
- Dump all DLLs from a specific process (with --pid=PID)
- Dump all DLLs from all processes
- Dump a PE from anywhere in process memory (with --base=BASEADDR), this option is useful for extracting hidden DLLs
To specify an output directory, use --dump-dir=DIR or -d DIR.
1. The Volatility Framework is a completely open collection of tools, implemented in Python for the extraction of digital artifacts from volatile memory (RAM) samples. Volatility is a memory forensics framework, to analyse ram memory dumps for Windows, Linux, and Mac. In order to analyse a operating system’s RAM memory in Volatility, you need to build the corresponding operating system’s profile.The extraction techniques are performed completely independent of the system being investigated but offer unprecedented visibility into the runtime state of the system. The framework is intended to introduce people to the techniques and complexities associated with extracting digital artifacts from volatile memory samples and provide a platform for further work into this exciting area of research.Vide this post, I am sharing how to install volatility in Ubuntu 12.04 in a step wise manner.The post includes screen-shots and ready to shoot terminal commands for installing other dependent libraries.
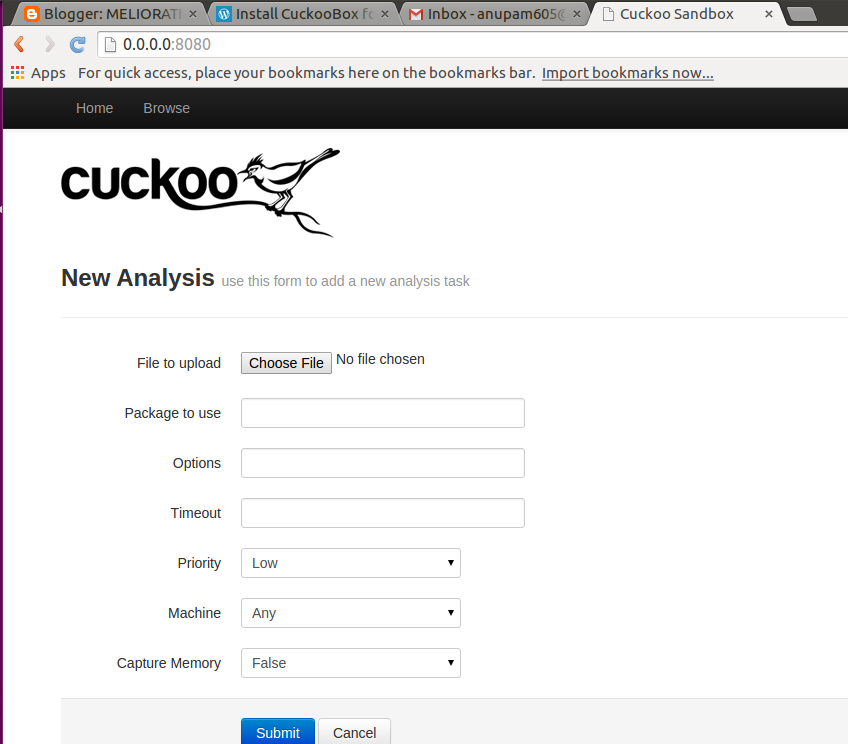
1. Cuckoo Sandbox is a malware analysis system tool which allows you to throw any suspicious file at it and in a matter of seconds it will provide you back some detailed results outlining what such file did when executed inside an isolated environment.It is written 100% in Python, the architecture is very interesting and it is based on a virtualisation engine like Virtual box to maintain a “fresh” pc always at hand to run the malware called the client, inside this client it is run as an agent that is also written 100% in Python to monitor the different calls that the malware do to the dll’s, host that try to connect, etc.The connection between the Server and the client is done through an isolated network set up by virtual box, it is configured that way in order to avoid the propagation of the malware and to communicate effectively between the client and the server to send the analysis report, infected binaries, etc.This post ahead brings you a step by step screenshot to download and configure this excellent tool,will be good for beginners in cyber security/penetration testing to play with and see results immediately.Though from the looks of this post below,the procedure looks cumbersome and complex,but I have made attempts for a naive to understand and follow up screenshot wise,any queries still will be most welcome :
WHAT IT DOES PRECISELY?
2. Cuckoo can produce the following types of results:
- Files being created, deleted, and downloaded by the malware during its execution
- Network traffic trace in PCAP format(as we get with wireshark and ethreal)
- Traces of win32 API calls spawned by the malware
- Memory dumps of the malware processes
- Screenshots of the Windows desktop as it happens during execution of the malware
- Full memory dumps of the machines
KINDS OF FILES FOR ANALYSIS
3. The following kinds of files can be analysed and put for check in cuckoo :
- Adequate RAM around 4 GB in all with the parent machine.
- i3 processor and above will help u lessen wait and make u patient
5. Python comes preinstalled with the Ubuntu Desktop,but we need some extra python libraries as follows :
Pydeep
Sqlalchemy
Bson
DPKT
Yara
MAEC Python bindings
Jinja2
Magic
Chardet
Pymongo
tcpdump
mongodb
Volatility
Libvirt
Bottlepy
Django
Pefile
Step 1
Firstly we will install all the above mentioned libraries vide a single command.You need to slect the below text and paste as it is in the terminal | sudo apt-get install mongodb python-sqlalchemy python-bson python-dpkt python-jinja2 python-magic python-pymongo python-gridfs python-libvirt python-bottle python-pefile python-chardet tcpdump -y
Besides above,there are other python libraries that need PIP for installation.Pip is an alternative to Easy Install for installing Python packages and is largely recommended when used in virtual environments.
Two additional software Yara and Pydeep too need to be installed and the cuckoo documentation states these need to be installed separately, however Yara is provided in the Ubuntu universe repository. but before installing Pydeep , we need to install some dependencies with the following command line to install the following :
Cuckoo requires Yara 1.7 or higher and to install yara,run the following command
sudo apt-get install yara -y
Pydeep depends on ssdeep 2.8+ and ssdeep needs to be compiled from source and likewise for Pydeep. Before doing so, a few packages are needed. The following commands will work :
| sudo apt-get install build-essential git python-dev -y | wget http://sourceforge.net/projects/ssdeep/files/ssdeep-2.12/ssdeep-2.12.tar.gz/download -O ssdeep.tar.gz | tar -xf ssdeep.tar.gz | cd ssdeep-2.12 | ./configure | make | sudo make install | ssdeep -V | 2.12(output for above)
We also need to install “git’:
sudo apt-get install git
Now cd to the directory Download, clone the pydeep project and install manually:
git clone https://github.com/kbandla/pydeep.git
cd pydeep
sudo python setup.py install
Install Yara
sudo apt-get install libtool automake
Then download yara form the git repository and install it:
Now we need to install yara-python with the following commands:
cd yara-python
sudo python setup.py install
Volatility supports memory dumps from all major 32- and 64-bit Windows versions and service packs including XP, 2003 Server, Vista, Server 2008, Server 2008 R2, Seven, 8, 8.1, Server 2012, and 2012 R2 but in recent past now on supports Linux memory dumps in raw or LiME format and include 35+ plugins for analyzing 32- and 64-bit Linux kernels from 2.6.11 - 3.16 and distributions such as Debian, Ubuntu, OpenSuSE, Fedora, CentOS, and Mandrake.VOLATILITY is to be installed next,we need the following commands:
Where user:usergroup is the user used to login to the ubuntu machine and the group is the group to which user belong
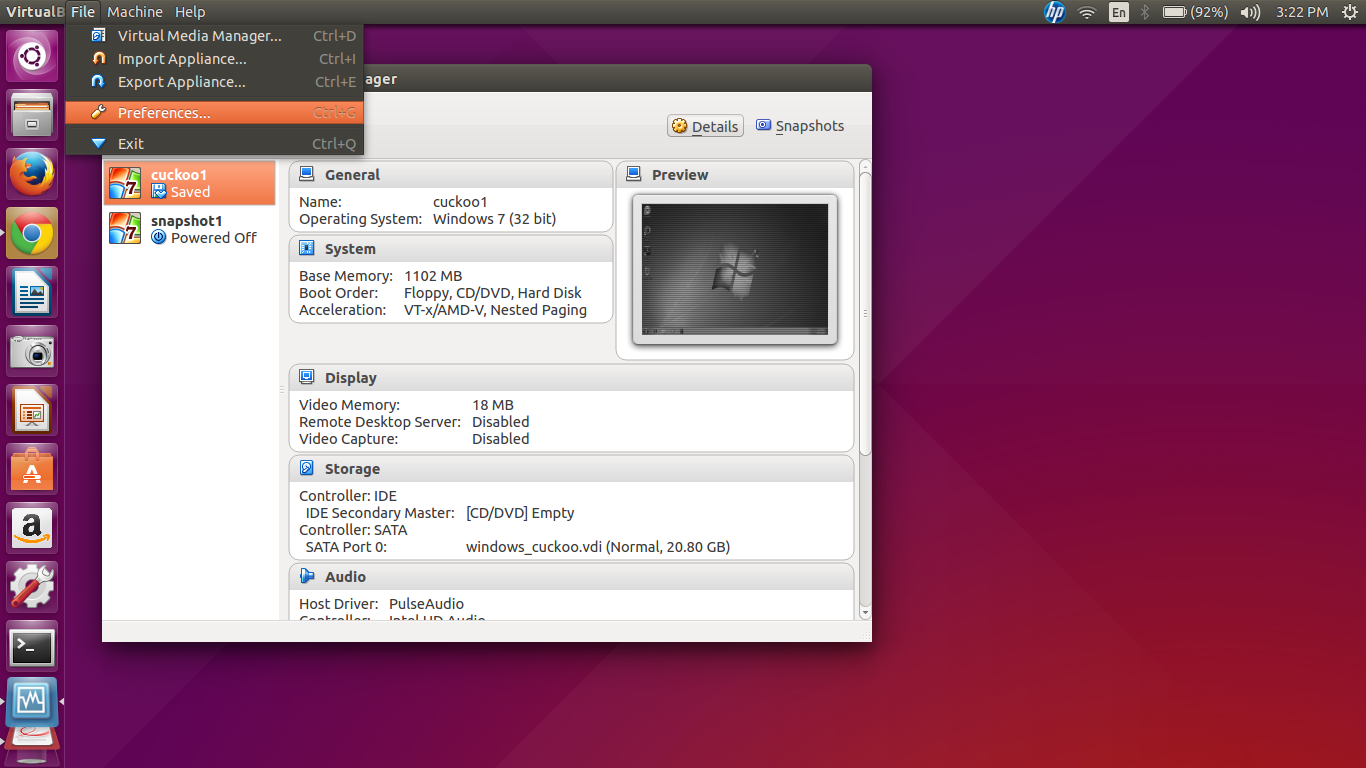
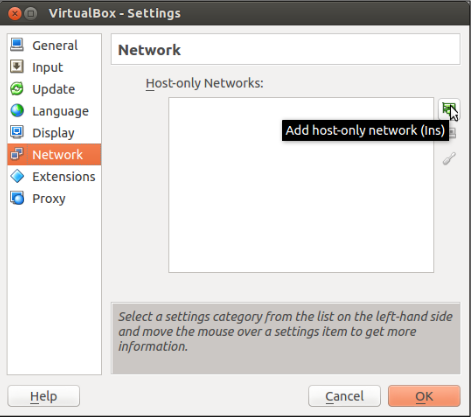
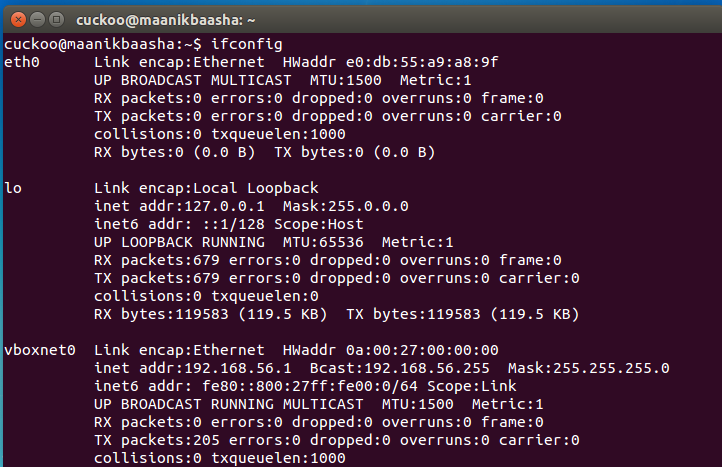
Now we shift our attention to configuring networks for Virtual Box and parent machine.So I assume you have installed Windows 7 in virtual box with Adobe,Microsoft Office and a Mozilla/Chrome browser.
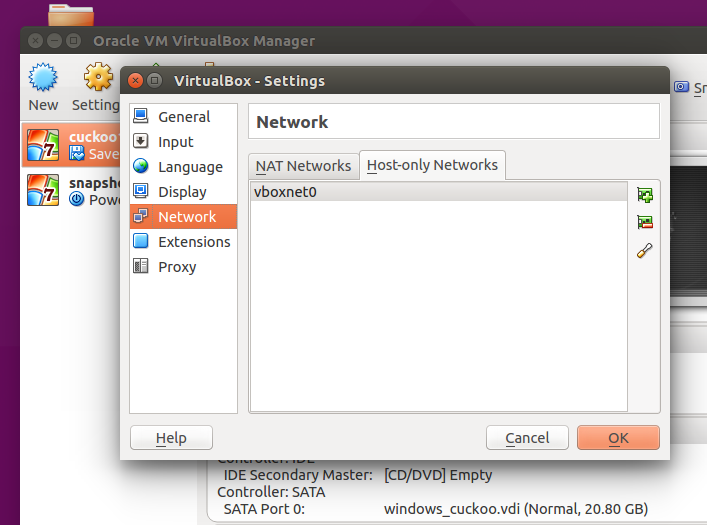
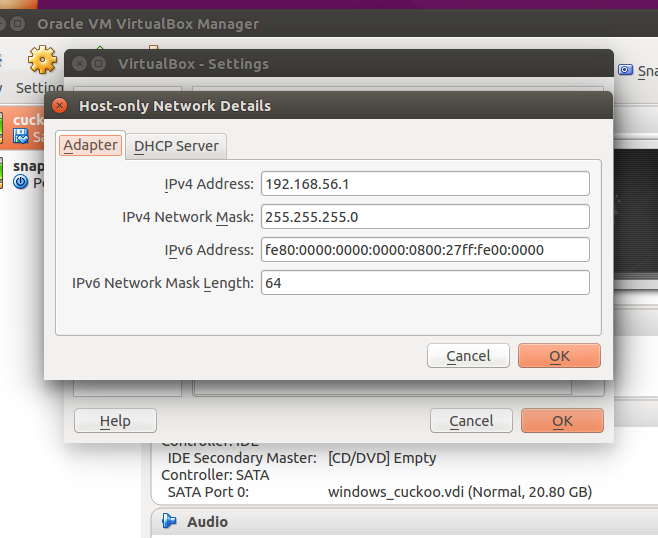
Configure as shown next below :
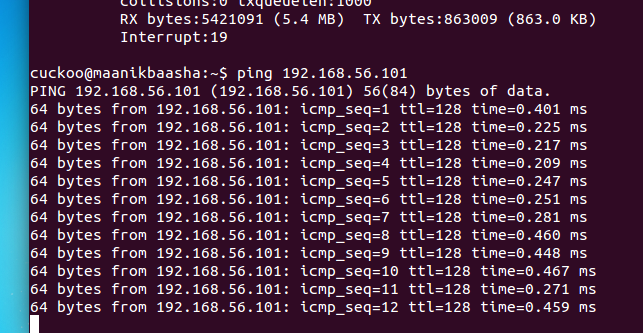
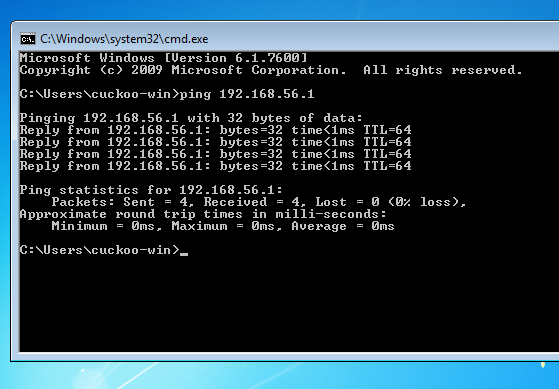
Vide the above,the two IP addresses I have configured to ping are :
Parent/Host OS : 192.168.56.1
Virtual Windows Machine : 192.168.56.101
Just ping from each IP to other,if they ping all is set now to work ahead.
and one important step that remains is to configure the conf files in the cuckoo configuration,Few important configuration files that we effect to work with are mentioned below with brief functionality:
cuckoo.conf : This configuration file contains information about the general behavior and analysis options in Cuckoo Sandbox. machinemanager.conf : This file holds the information about your virtual machine configuration: Depends on the name of virtualization that we used. processing.conf : This file is used for enabling/configuring the processing of modules. reporting.conf : This file contains information about reporting methodologies.
There are a few things required to be changed in the configuration files as follows:
[I used gedit to edit and make amends to these conf files]
/opt/cuckoo/conf/cuckoo.conf
[cuckoo] memory_dump = on [resultserver] ip = [ip address of the vboxnet0 interface, to check it issue on terminal ifconfig vboxnet0, usually 192.168.56.1]
/opt/cuckoo/conf/virtualbox.conf
[cuckoo1] label = [Name of the Windows guest virtual machine as configured on VirtualBox] ip = [ip address configured i the windows guest] snapshot = [the name of the snapshot taken with virtual box] /opt/cuckoo/conf/memory.conf [basic] delete_memdump = yes
/opt/cuckoo/conf/processing.conf
[memory] enabled = yes [virustotal] enabled = yes key = [key of the virus total API, could be obtained registering in http://www.virustotal.com
/opt/cuckoo/conf/reporting.conf
[maec40] enabled = yes [mongodb] enabled = yes
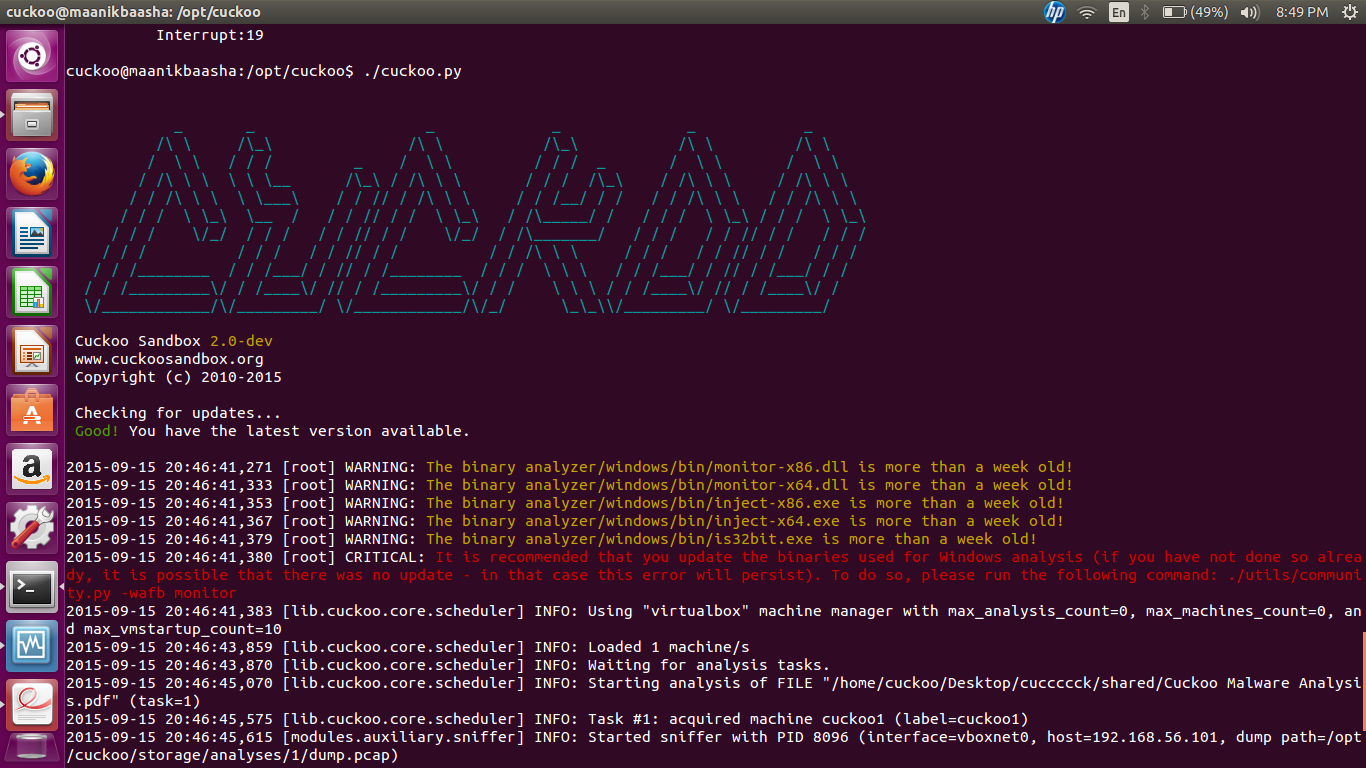
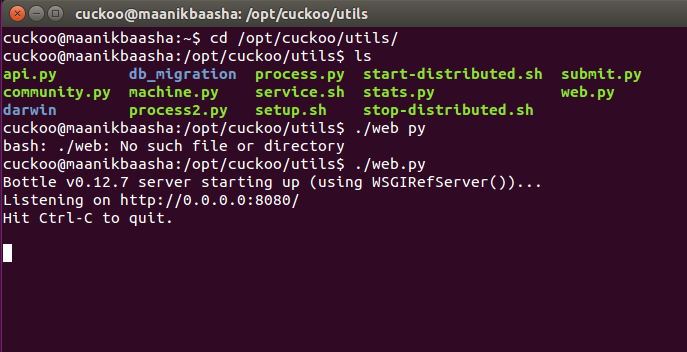
Now we can run Cuckoo after all the hardwork :
run the command as shown below and you should get the screen as below :
sudo python /opt/cuckoo/cuckoo.py
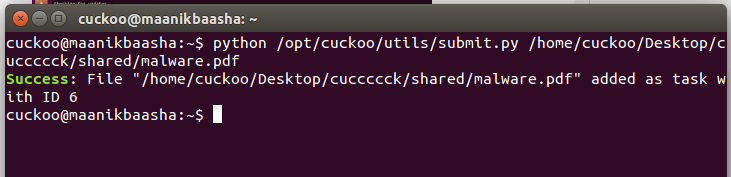
Now we need to do a submission of a file vide a script as shown below :
 https://orcid.org/0000-0002-9097-2246