Social Icons

Showing posts with label ubuntu 18.04 LTS. Show all posts

Monday, December 02, 2019

EMBARK BLOCKCHAIN FRAMEWORK : INSTALLATION Ubuntu 18.04 LTS

Embark is a framework that allows you to easily develop and deploy Decentralized Applications (DApps).A Decentralized Application is a serverless html5 application that uses one or more decentralized technologies.Embark currently integrates with EVM blockchains (Ethereum), Decentralized Storages (IPFS), and Decentralized communication platforms 
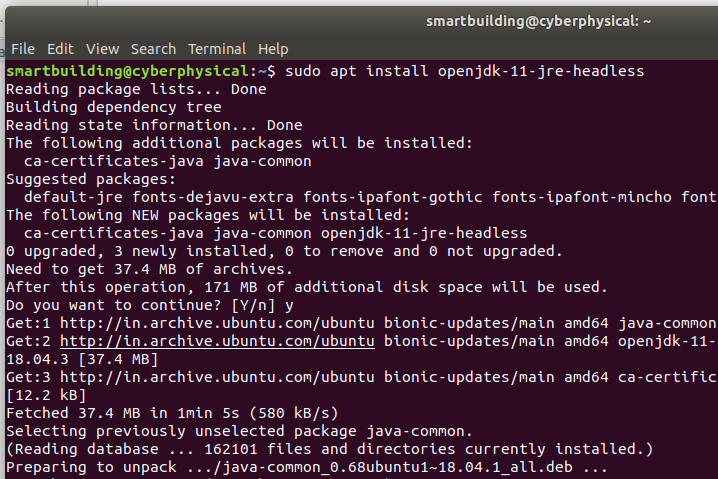
(Whisper and Orbit). Swarm is supported for deployment.This post gives the screen shots for installing a demo contract on EMBARK platform.Embark needs few per-requisites and tools installed including Node,Geth and IPFS.The complete list of history command as executed for getting EMBARK running is produced below :


1 sudo apt-get update
2 sudo apt-get install npm
3 sudo npm -g install embark
4 sudo npm i nyc
5 sudo apt-get install software-properties-common
6 sudo npm install
7 sudo npm -g install embark
8 curl -sL https://deb.nodesource.com/setup_10.x | sudo -E bash -
9 sudo apt install nodejs
10 curl -o- https://raw.githubusercontent.com/creationix/nvm/v0.34.0/install.sh | bash
11 nvm install node
12 nvm install --lts
13 nvm install 8.10.0
14 nvm use v10.19.0
15 nvm install v10.19.0
16 npm install -g embark
17 embark -version
18 embark demo
19 cd embark_demo/
20 embark run


Saturday, November 02, 2019

HYPERLEDGER FABRIC ON UBUNTU 18.04 LTS : INSTALLATION STEPS WITH TERMINAL COMMANDS

Hyperledger is an umbrella project of open source blockchains and related tools, started in December 2015 by the Linux Foundation, and has received contributions from IBM, Intel and SAP Ariba, to support the collaborative development of blockchain-based distributed ledgers.The following post ahead will see through the screenshots and steps for installation of Hyperledger Fabric on Ubuntu 18.04 LTS. The installation basically first creates the required environs and then the actual installation of.

The actual terminal history I got after the installation is placed below.Between 11-13 terminal commands,if you get an error,please reboot and proceed.

    1  sudo apt-get update
    2  sudo apt-get install curl
    3  sudo dpkg --configure -a - i ran this owing to an error in between
    4  sudo apt-get install curl
    5  sudo apt --fix-broken install - i ran this owing to an error in between
    6  sudo apt-get install curl
    7  sudo apt-get install npm
    8  sudo apt-get install docker
    9  curl -fsSL https://download.docker.com/linux/ubuntu/gpg | sudo apt-key add -
   10  sudo add-apt-repository "deb [arch=amd64] https://download.docker.com/linux/ubuntu $(lsb_release -cs) stable"
   11  apt-cache policy docker-ce - might need a reboot if error seen
   12  sudo apt-get install -y docker-ce
   13  docker info
   14  sudo docker info
   15  sudo apt-get install -y docker-ce
   16  sudo apt-get install docker-compose
   17  sudo apt-get upgrade
   18  sudo curl -sSL https://goo.gl/6wtTN5 | sudo bash -s 1.1.0
   19  history
   20  sudo chmod 777 -R fabric-samples
   21  cd fabric-samples/first-network
   22  sudo ./byfn.sh generate
   23  sudo ./byfn.sh up


The following applications and software's need to be installed first for Hyperledger Fabric:

  • CURL
  • GO Programming Language
  • Docker
  • Docker Compose
  • Node.js Runtime
  • NPM
  • PYTHON

The following is the set of commands used for the entire installation.These commands are followed by the respective screen shots of the executed commands.


So...all good and the fabric is installed...

Thursday, October 10, 2019

GANACHE Blockchain installation UBUNTU 18.04 LTS

Ganache is a personal blockchain for Ethereum development one can use to deploy contracts, develop  applications, and run tests. It is available as both a desktop application as well as a command-line tool. Ganache is available for Windows, Mac, and Linux.This post will share few commands and screen shots to install Ganache in GUI mode in Ubuntu 18.04 LTS. It is an ethereum client which one can use for Ethereum development and is part of Truffle ecosystem. Ganache is used for the development of DAPP and once  developed and tested on the ganache,it can be deployed on any DAPP on ethereum client like geth or parity.


 Second step : Click at the Download button.
 Third step : chmod a+x ganache**** to make it executable
 Fourth step as above...simply run the executable
 Its ready to go...


Monday, October 07, 2019

SUBLIME editor installation in UBUNTU 18.04 LTS

1. Sublime Text is a proprietary cross-platform source code editor with a Python application programming interface. It natively supports many programming languages and markup languages, and functions can be added by users with plugins, typically community-built and maintained under free-software licenses.The installation part of the same on Ubuntu will just take few commands as seen below and the sublime editor will be ready to go.The commands are listed below : 

First step

wget -qO - https://download.sublimetext.com/sublimehq-pub.gpg | sudo apt-key add -
(click on image to enlarge)
 Second step


echo "deb https://download.sublimetext.com/ apt/stable/" | sudo tee /etc/apt/sources.list.d/sublime-text.list

(click on image to enlarge)


Third step

sudo apt update 

(click on image to enlarge)


Fourth step

sudo apt install sublime-text

(click on image to enlarge)

and you are ready to work on sublime

(click on image to enlarge)

Sunday, September 22, 2019

Installation Cupcarbon : Smart City and Internet of Things Wireless Sensor Network simulator

1.    CupCarbon is a Smart City and Internet of Things Wireless Sensor Network (SCI-WSN) simulator. Its objective is to design, visualize,debug and validate distributed algorithms for monitoring,environmental data collection, etc., and to create environmental scenarios such as fires, gas, mobiles, and generally within
educational and scientific projects. Not only it can help to visually explain the basic concepts of sensor networks and how they work; it also supports scientists to test their wireless topologies, protocols, etc.

2.   Although otherwise an easy installation,but with the Java changes effecting 16 Apr 2019 wherein the release of Oracle Java 8 update 211 / 212 – also known as Oracle’s first ‘not free for production use’ patchset,the installation instructions are little changed.

3.   This post will bring you simple set of commands executed with screenshots to run this awesome simulator CUPCARBON.The simulator is available for download at http://cupcarbon.com/download.html .

4.  Once downloaded the following commands will get you the desktop with cupcarbon running. My friend Ayaz helped me out in these.

$ sudo apt-get update
 $ sudo apt-get upgrade
 next we need to check if java is installed by checking the version by the following command :

$ java -version

If there is no java installed we need to install by typing the following :

$ sudo apt install openjdk-11-jre-headless
 Once installed check the output and we should get the following :

 Now we need to install javafx with the following command :

$ sudo apt install openjfx
 Once installed,we can query with the following command and get the expected output as seen below :
$ dpkg-query -L openjfx

/usr
/usr/share
/usr/share/doc
/usr/share/doc/openjfx
/usr/share/doc/openjfx/TODO.Debian
/usr/share/doc/openjfx/changelog.Debian.gz
/usr/share/doc/openjfx/copyright
/usr/share/openjfx
/usr/share/openjfx/lib
/usr/share/openjfx/lib/javafx.properties
/usr/share/openjfx/lib/javafx.base.jar
/usr/share/openjfx/lib/javafx.controls.jar
/usr/share/openjfx/lib/javafx.fxml.jar
/usr/share/openjfx/lib/javafx.graphics.jar
/usr/share/openjfx/lib/javafx.media.jar
/usr/share/openjfx/lib/javafx.swing.jar
/usr/share/openjfx/lib/javafx.web.jar

Now move to the location where you have downloaded the cupcarbon.jar file.Unzip the same and change the execution properties as

$ chmod +x cupcarbon.jar

Once done,we need to execute and run the carbon.jar file by defining the route and javafx

$ java --module-path /usr/share/openjfx/lib --add-modules=javafx.controls,javafx.fxml,javafx.base,javafx.media,javafx.web,javafx.swing -jar '/home/smartbuilding/Downloads/cupcarbon/CupCarbon/cupcarbon.jar'

Here in the above command you need to define and enter the path which is being used in ur PC.In my case the path is home/smartbuilding/Downloads/cupcarbon/CupCarbon/cupcarbon.jar

The above should run successfully and give you the below screen that runs the cupcarbon simulator


Thanks Ayaz bhai....for the inputs.He is available at https://ayaztechy.blogspot.com/
Powered By Blogger