1. OwnCloud is a suite of client-server software for creating file hosting services and using them. For those who have been traditionally hooked to the pirated copies of Windows Server Softwares or used to crashing regulars of MS Server 2008 or even 2012 and later,I would rate this suite much better w.r.t simplicity of installation,less of configuration issues and the best part being open-source with lots of options for the user.I got introduced to it via a friend Nagraj and have been percolating in my circle since.
2. OwnCloud is functionally very similar to the widely used Dropbox, with the primary functional difference being that OwnCloud is free and open-source, and thereby allowing anyone to install and operate it without charge on a private server, with no limits on storage space (except for disk capacity or account quota) or the number of connected clients.This post will give a stepped screenshot for installing the same on a Ubuntu 14.04 LTS version machine.
3. The installation ahead has been done in a Virtual environment(I used Virtual Box) with the following setup :
First Virtual Machine : Ubuntu 14.04 LTS 64 bit with 2 GB RAM.This machine will be installed with the Owncloud server part.
Second Virtual Machine : Windows 7/32 bit 2 GB .This machine will be used as the client part who will be able to access the own cloud via web interface.
Installation
Firstly , the ethernet settings that come default to a new machine in UBUNTU are seen below.We will configure this later during installation.
As we see localhost which currently has been not configured,we see the following screen :
Go to Terminal and type : sudo sh -c "echo 'deb http://download.opensuse.org/repositories/isv:/ownCloud:/community/xUbuntu_14.04/ /' >> /etc/apt/sources.list.d/owncloud.list"
...as it fetches,the screen keeps showing you thousands of lines of terminal commands being executed as below :
the screen prompts for a root user sql password as below :
continues installation part...
and finally the screen scroll gets over with the installation and is seen like this :
Check the local host and u get this screen showing the Apache2 Ubuntu default page.
and then you type at the web address : localhost/owncloud and you get the screen as below :
Click storage and database link below the login
Enter the sql root user and password as set earlier and click Finish setup and you get the successful login interface of admin as below :
Meanwhile lets configure the network settings as below in the Ubuntu machine :
The windows client networking addresses are configured as below :
The network addresses for the Ubuntu machine are configured as below :
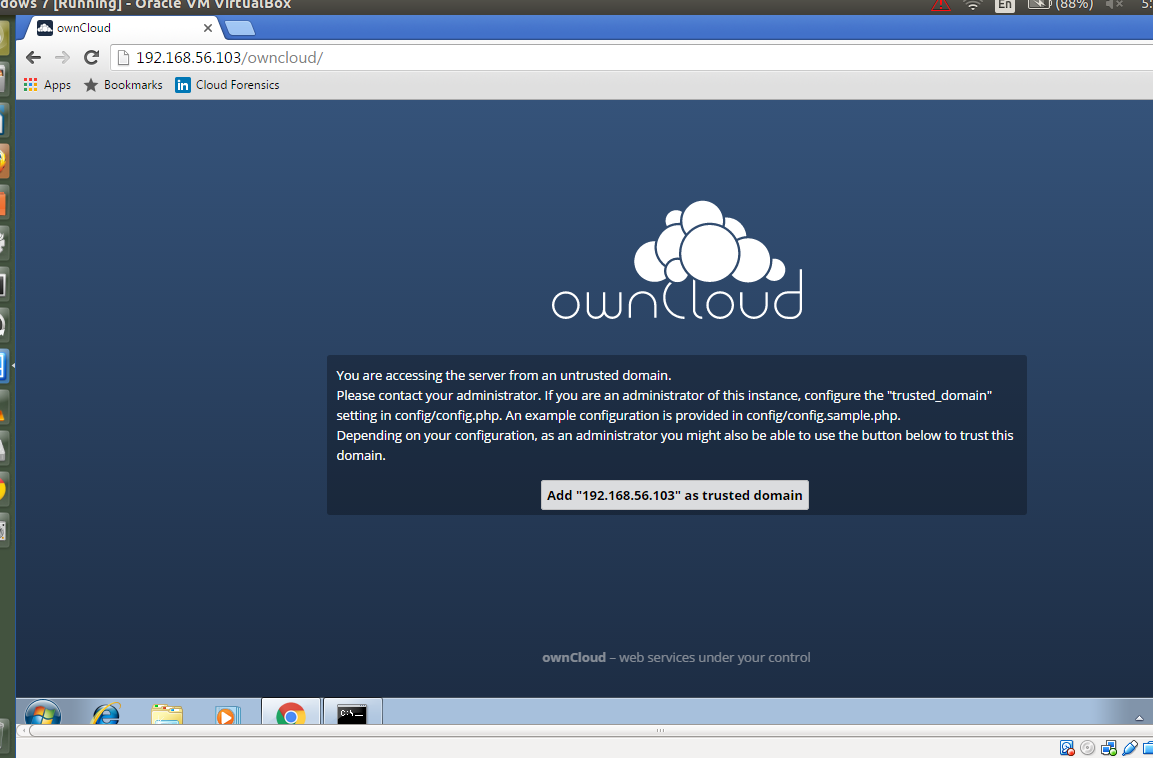
Now from the client web browser ,try and access the server by typing the IP address/owncloud and you will likely get the following screen.
To resolve the issue we need to add this IP address in the trusted domain in the config.php file as seen below.The location of this config.php file is at /var/www/owncloud/config
and you refresh the windows browser and you ready to go....
For any clarifications whilst installation you are free to comment here...reply assured asap. :-)
DICE is the Digital Investigations Conference and Exhibition which is held annually in the Delhi/NCR region in India.It is the only Conference and Exhibition of its kind in all of South Asia. It is targeted towards Digital Investigations and Computer Forensics personnel. At this conference experts showcase best practices, case studies and experiences in dealing with both cyber and conventional crime and security incidents with the help of digital technologies. It is attended by law enforcement, government and corporate investigation professionals. I participated in the conference as a speaker on the topic CLOUD FORENSICS.The presentation brings out the primary challenges in the domain of Cloud Computing.
1. In this post we get introduced to built in scanners that come preloaded with Metasploit in Kali Linux that let us search and recover service information from a single computer or an entire network.We assume the same setup of virtual machines as in my past post at http://anupriti.blogspot.in/2015/10/irc-exploit-tutorial-to-hack-into-root.html
Machines pinging each other...please check before proceeding ahead
Using SCANNERS to gain info
To find scanners available in Kali Linux,just run “msfconsole” from Kali command prompt and then type “search scanner” at the prompt as below :
msf > search scanner
U get something like this as seen below which is actually trimmed shot as the complete out is pretty exhaustive.
CLICK TO ENLARGE
nmap the metasploitable machine...as we did earlier and we get this screen as below :
CLICK TO ENLARGE
Let’s focus on Port 22 ie Secure Shell (ssh) and thus search Metasploit for ssh scanners as follows :
SSH
At msf terminals type : search scanner/ssh
Click to ENLARGE
We see from above about six of them and in these there is one looking for version information ie the “auxiliary/scanner/ssh/ssh_version” module.Will use this to find the version info as follows :
- Type, “use auxiliary/scanner/ssh/ssh_version” at the terminal of msf
- Then type “show options”
- set RHOSTS
- Type “exploit” to run.
From above we see that the victim is running an SSH server and the software version is
SSH-2.0-OpenSSH_4.7p1 Debian-8ubuntu
Mysql
But the above comes with a exclamation too...if we run mysql version query,then too we get some result that's different as seen below :
Click to ENLARGE
The scan reveals that MySQL 5.0.51.a-3ubuntu5 is running as seen in the shot above.
telnet
Click to ENLARGE
Highlighted text “Login with msfadmin/msfadmin to get started”, actually gives login credentials on the Telnet page....these kinds of security holes actually exists in the real world..real web at so many web sites....
1. Cuckoo Sandbox is a malware analysis system tool which allows you to throw any suspicious file at it and in a matter of seconds it will provide you back some detailed results outlining what such file did when executed inside an isolated environment.It is written 100% in Python, the architecture is very interesting and it is based on a virtualisation engine like Virtual box to maintain a “fresh” pc always at hand to run the malware called the client, inside this client it is run as an agent that is also written 100% in Python to monitor the different calls that the malware do to the dll’s, host that try to connect, etc.The connection between the Server and the client is done through an isolated network set up by virtual box, it is configured that way in order to avoid the propagation of the malware and to communicate effectively between the client and the server to send the analysis report, infected binaries, etc.This post ahead brings you a step by step screenshot to download and configure this excellent tool,will be good for beginners in cyber security/penetration testing to play with and see results immediately.Though from the looks of this post below,the procedure looks cumbersome and complex,but I have made attempts for a naive to understand and follow up screenshot wise,any queries still will be most welcome :
WHAT IT DOES PRECISELY?
2. Cuckoo can produce the following types of results:
- Files being created, deleted, and downloaded by the malware during its execution
- Network traffic trace in PCAP format(as we get with wireshark and ethreal)
- Traces of win32 API calls spawned by the malware
- Memory dumps of the malware processes
- Screenshots of the Windows desktop as it happens during execution of the malware
- Full memory dumps of the machines
KINDS OF FILES FOR ANALYSIS
3. The following kinds of files can be analysed and put for check in cuckoo :
- Adequate RAM around 4 GB in all with the parent machine.
- i3 processor and above will help u lessen wait and make u patient
5. Python comes preinstalled with the Ubuntu Desktop,but we need some extra python libraries as follows :
Pydeep
Sqlalchemy
Bson
DPKT
Yara
MAEC Python bindings
Jinja2
Magic
Chardet
Pymongo
tcpdump
mongodb
Volatility
Libvirt
Bottlepy
Django
Pefile
Step 1
Firstly we will install all the above mentioned libraries vide a single command.You need to slect the below text and paste as it is in the terminal | sudo apt-get install mongodb python-sqlalchemy python-bson python-dpkt python-jinja2 python-magic python-pymongo python-gridfs python-libvirt python-bottle python-pefile python-chardet tcpdump -y
Besides above,there are other python libraries that need PIP for installation.Pip is an alternative to Easy Install for installing Python packages and is largely recommended when used in virtual environments.
Two additional software Yara and Pydeep too need to be installed and the cuckoo documentation states these need to be installed separately, however Yara is provided in the Ubuntu universe repository. but before installing Pydeep , we need to install some dependencies with the following command line to install the following :
Cuckoo requires Yara 1.7 or higher and to install yara,run the following command
sudo apt-get install yara -y
Pydeep depends on ssdeep 2.8+ and ssdeep needs to be compiled from source and likewise for Pydeep. Before doing so, a few packages are needed. The following commands will work :
| sudo apt-get install build-essential git python-dev -y | wget http://sourceforge.net/projects/ssdeep/files/ssdeep-2.12/ssdeep-2.12.tar.gz/download -O ssdeep.tar.gz | tar -xf ssdeep.tar.gz | cd ssdeep-2.12 | ./configure | make | sudo make install | ssdeep -V | 2.12(output for above)
We also need to install “git’:
sudo apt-get install git
Now cd to the directory Download, clone the pydeep project and install manually:
git clone https://github.com/kbandla/pydeep.git
cd pydeep
sudo python setup.py install
Install Yara
sudo apt-get install libtool automake
Then download yara form the git repository and install it:
Now we need to install yara-python with the following commands:
cd yara-python
sudo python setup.py install
Volatility supports memory dumps from all major 32- and 64-bit Windows versions and service packs including XP, 2003 Server, Vista, Server 2008, Server 2008 R2, Seven, 8, 8.1, Server 2012, and 2012 R2 but in recent past now on supports Linux memory dumps in raw or LiME format and include 35+ plugins for analyzing 32- and 64-bit Linux kernels from 2.6.11 - 3.16 and distributions such as Debian, Ubuntu, OpenSuSE, Fedora, CentOS, and Mandrake.VOLATILITY is to be installed next,we need the following commands:
Where user:usergroup is the user used to login to the ubuntu machine and the group is the group to which user belong
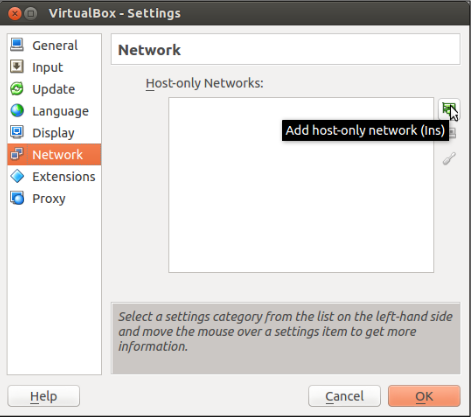
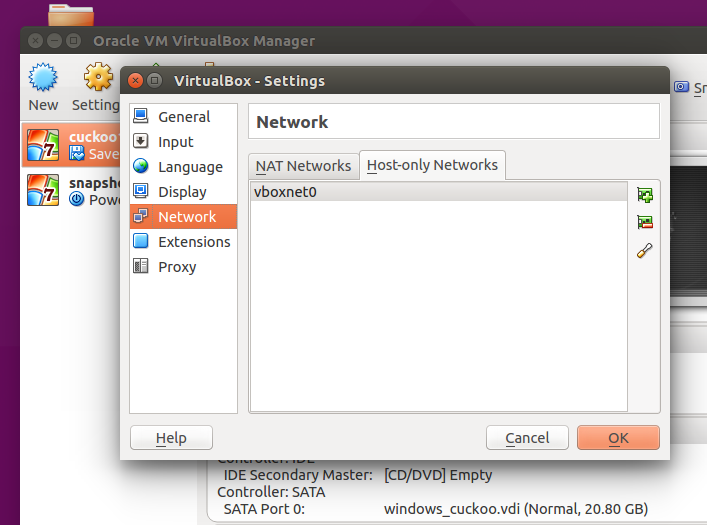
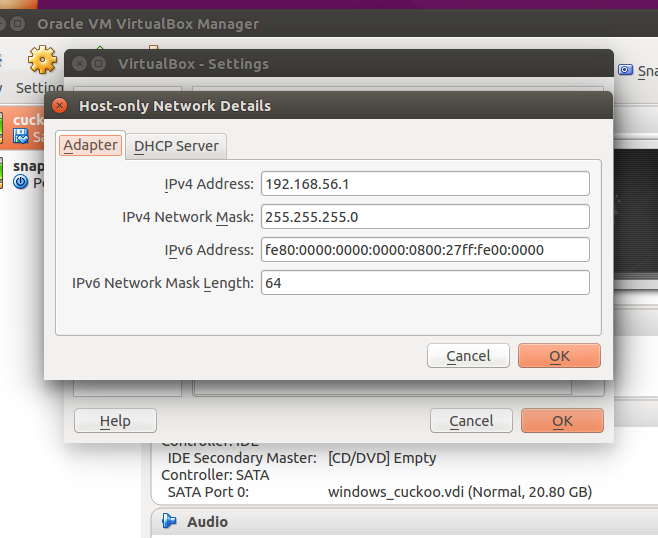
Now we shift our attention to configuring networks for Virtual Box and parent machine.So I assume you have installed Windows 7 in virtual box with Adobe,Microsoft Office and a Mozilla/Chrome browser.
Configure as shown next below :
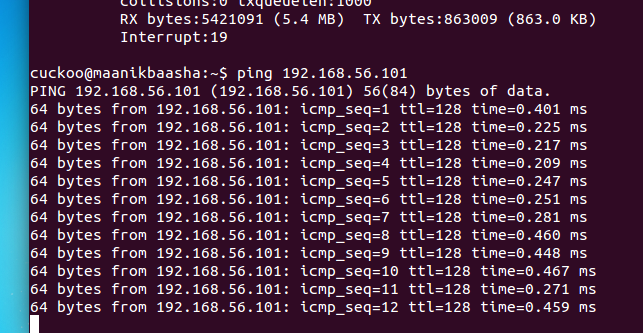
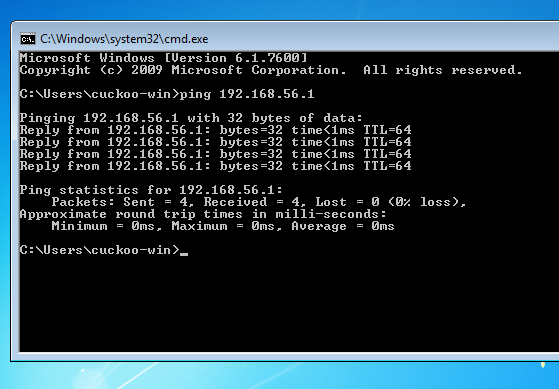
Vide the above,the two IP addresses I have configured to ping are :
Parent/Host OS : 192.168.56.1
Virtual Windows Machine : 192.168.56.101
Just ping from each IP to other,if they ping all is set now to work ahead.
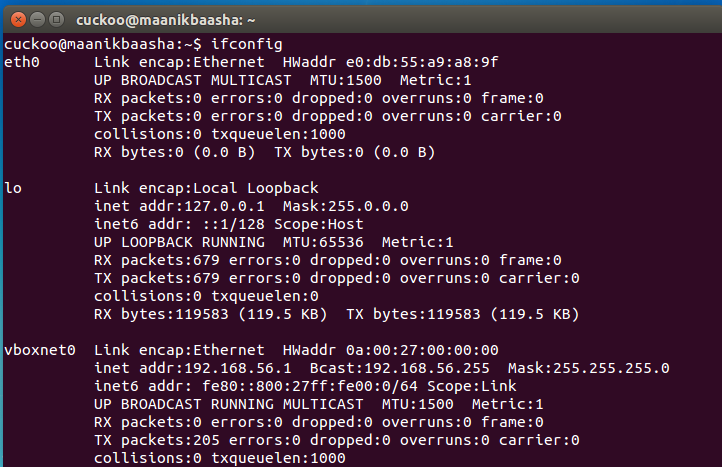
and one important step that remains is to configure the conf files in the cuckoo configuration,Few important configuration files that we effect to work with are mentioned below with brief functionality:
cuckoo.conf : This configuration file contains information about the general behavior and analysis options in Cuckoo Sandbox. machinemanager.conf : This file holds the information about your virtual machine configuration: Depends on the name of virtualization that we used. processing.conf : This file is used for enabling/configuring the processing of modules. reporting.conf : This file contains information about reporting methodologies.
There are a few things required to be changed in the configuration files as follows:
[I used gedit to edit and make amends to these conf files]
/opt/cuckoo/conf/cuckoo.conf
[cuckoo] memory_dump = on [resultserver] ip = [ip address of the vboxnet0 interface, to check it issue on terminal ifconfig vboxnet0, usually 192.168.56.1]
/opt/cuckoo/conf/virtualbox.conf
[cuckoo1] label = [Name of the Windows guest virtual machine as configured on VirtualBox] ip = [ip address configured i the windows guest] snapshot = [the name of the snapshot taken with virtual box] /opt/cuckoo/conf/memory.conf [basic] delete_memdump = yes
/opt/cuckoo/conf/processing.conf
[memory] enabled = yes [virustotal] enabled = yes key = [key of the virus total API, could be obtained registering in http://www.virustotal.com
/opt/cuckoo/conf/reporting.conf
[maec40] enabled = yes [mongodb] enabled = yes
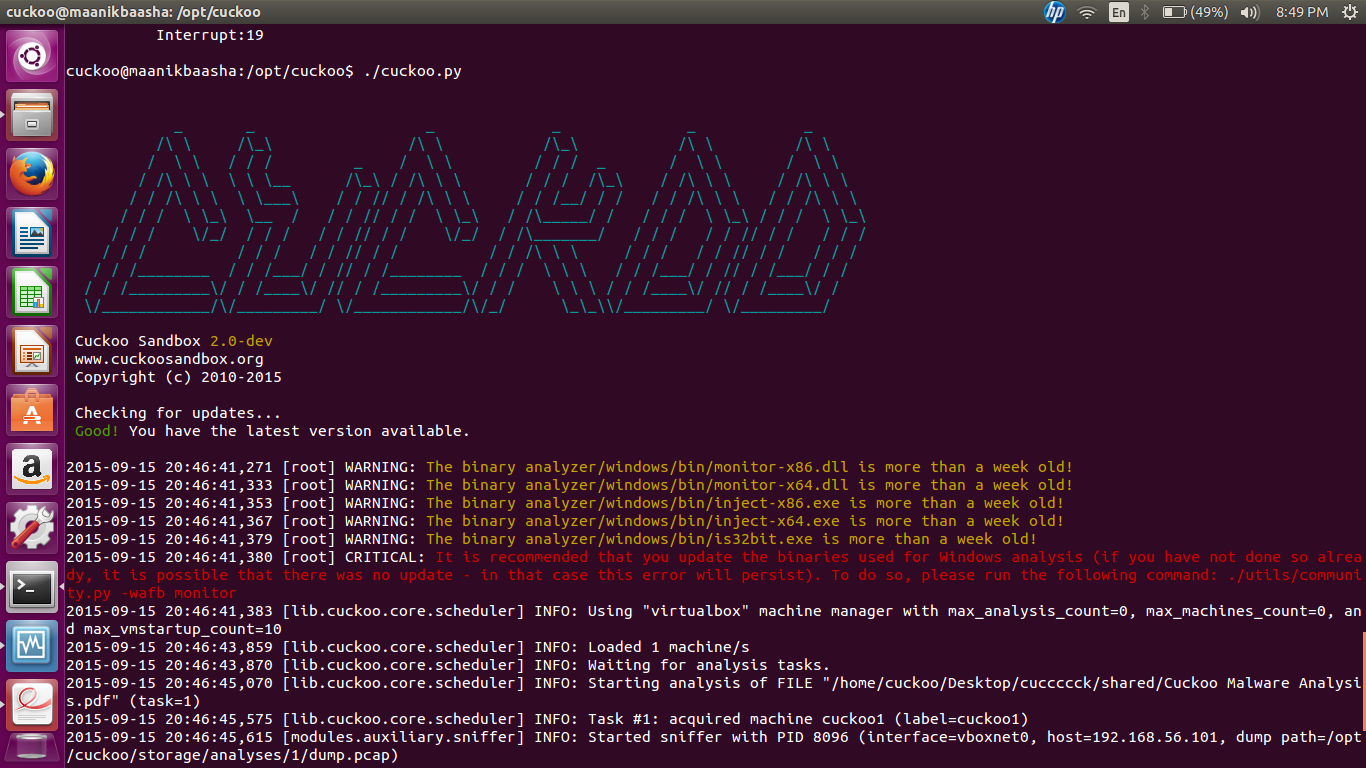
Now we can run Cuckoo after all the hardwork :
run the command as shown below and you should get the screen as below :
sudo python /opt/cuckoo/cuckoo.py
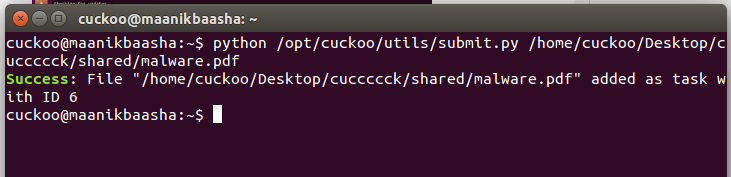
Now we need to do a submission of a file vide a script as shown below :
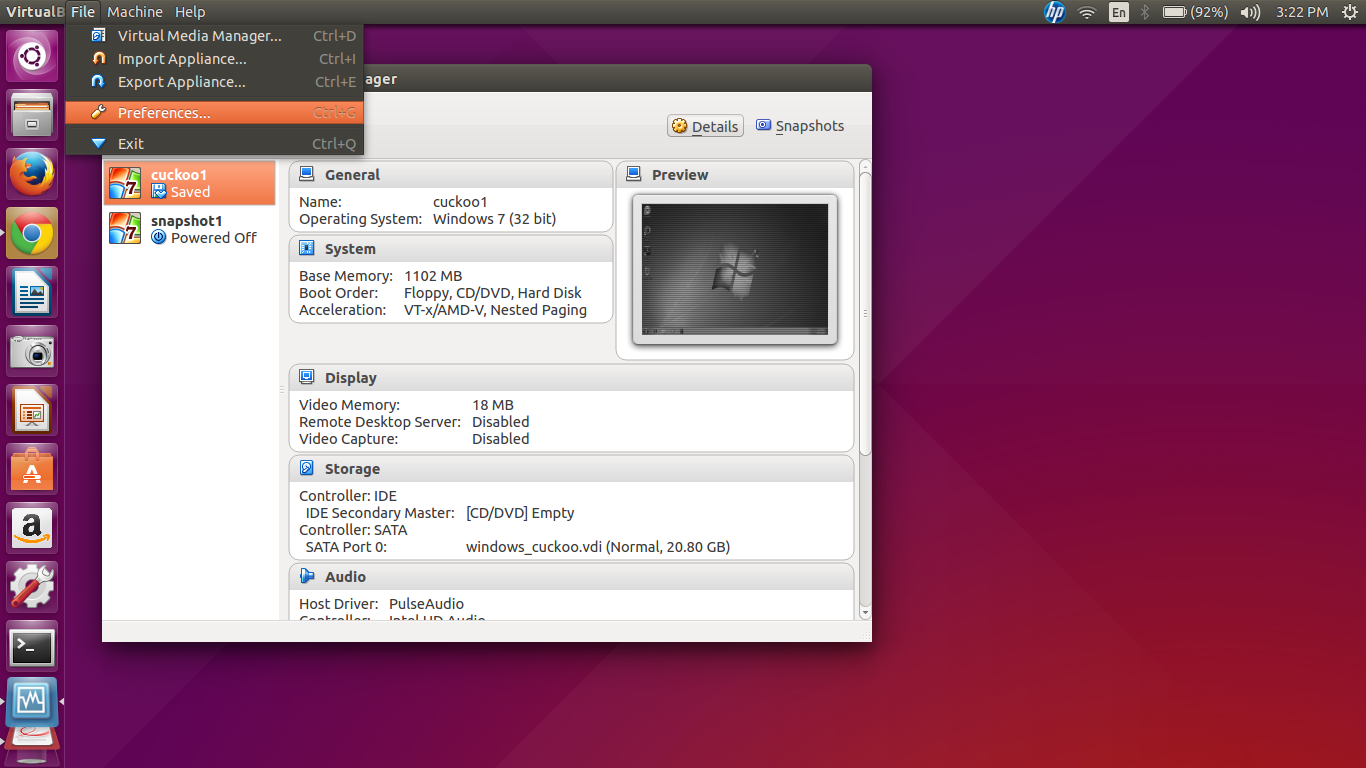
In one of my recent updates in UBUNTU 14.04 LTS,I faced an issue in the installed virtual box machines giving a message that goes as follows :
Unsupported version 11 of data unit 'vga' (instance #0, pass 0xffffffff) (VERR_SSM_UNSUPPORTED_DATA_UNIT_VERSION).
Result Code: NS_ERROR_FAILURE (0x80004005)
Component: Console
Interface: IConsole {1968b7d3-e3bf-4ceb-99e0-cb7c913317bb}
This was in-spite of the fact that I had saved my virtual machine in the manner it is supposed be and was not a power off.The machine as made to start vide the VB interface went showing the progress bar but was then followed by this above message.
How I solved this :
After working out many attempts to update and repair the Virtual Box,the simple way worked out like shown in the pic below :
Yes...it is as simple as choosing the machine and selecting "DISCARD SAVED STATE"
1. Setting this up is a simple thing till the time you know how to do it...here I bring you a step by step thing of how you putty to a Backtrack5 v3 machine installed in a Virtual Box from a Ubuntu host OS....
2. First thing is configuring a additional network card on the BTR3 machine.Select the virtual machine and click on Settings,then move to Network settings and then in the Network adapter, there will be a pre-installed NAT adapter for internet usage of the host machine.Under Adapter 2 select Host only Adapter.
Adapter 1 Default Configuration
Adapter 2 to be Configured
Before you get ready to ssh...u need to ensure that ssh service is running in Backtrack...which by default is not...run the terminal commands as seen below in the screen shots...
ifconfig as seen at terminal of the Backtrack R3 machine
Putty to IP of the Backtrack Machine
Putty successfully asks for login as seen below :
Login with Backtrack credentials :
Here above we get the msfconsole...ready to accept the commands....
 https://orcid.org/0000-0002-9097-2246